Quantcast
Channel: Seth Kenlon at Opensource.com
Viewing all 534 articles
Browse latest View live

How to get started with LightZone

$
0
0

In the previous two months, we've looked at Darktable and digiKam as open source photo management and editing suites. A third open source photographer's suite, called LightZone, has been around since 2005 as a closed source application, but got open sourced when its parent company dissolved in 2011. As a result, LightZone is now free and open source software for high-end photo editing and management. LightZone is written mostly in Java, although it uses some external libraries for certain image formats; even so, it's ardently cross-platform and very powerful.

Java dependencies

Being based mostly on Java, LightZone assumes a fairly robust Java environment. For an operating system to pre-install Java is becoming rare, so if you don't use many Java applications on your system, you may not have all the Java packages LightZone expects to find. It's down to what Java kit you do install, so for the quickest and easiest results, you can install the full JDK. That should have everything you need.

If you prefer to micro-manage, you can install OpenJDK or, if you prefer, IcedTea, but if you take this route, extra Java classes may end up being be required.

If you try to launch LightZone and it complains about missing Java classes, search for the error online and install the Java component that is said to resolve the missing class. I only encountered errors when installing Java piecemeal; specifically, I hit a java.lang.NoClassDefFoundError: javax/help/HelpSetException error that seems to be fairly common, but an online search and an install of the javahelp2 package fixed the issue.

Installing LightZone

LightZone can be downloaded from lightzoneproject.org, although you must register with the website before reaching a download link.

On Linux, you can install LightZone in two different ways. You can either install it to your filesystem using checkinstall or you can just run it from your user directory.

To install with checkinstall:

    $ mkdir lightzone-4.1.1
    $ tar xvf lightzone*4*xz -C lightzone-4.1.1
    $ cd lightzone-4.1.1
    $ sudo checkinstall

This builds and installs a .deb, .rpm, or .tgz package (depending on what's appropriate for your distribution). You can manage the package as usual using your system's packaging tools (dpkg, rpm, pkgtools).

To run from a local directory:

    $ mkdir -p $HOME/bin/lightzone4
    $ tar xvf lightzone*4*xz -C lightzone4
    $ cd lightzone4
    $ sed -i 's|usrdir=/usr|usrdir=$HOME/bin/lightzone4/usr|' ./usr/bin/lightzone
    $ ln $HOME/bin/lightzone/usr/bin/lightzone4 -s $HOME/bin/lightzone

To launch from the local directory, run $HOME/bin/lightzone from a shell, or modify the lightzone.desktop file to run that command for you.

LightZone basics

LightZone, like Darktable and a few closed source competitors, is designed to be a photography workflow application. LightZone is not trying to replace a photo compositor, such as GIMP; it's trying to make your photos easy to find, sort, and re-touch. An ideal user is anyone who takes lots of photos—such as a wedding photographer, a studio photographer, or any average tourist with a cell phone—and needs to ingest hundreds or thousands of shots, sort through 5 or 10 versions of essentially the same subject, choose the best one of the bunch, touch up any imperfections, and publish the results.

When you first launch LightZone, it starts in Browse mode. At first, your workspace is empty, so you can choose a folder containing images from the file tree on the left. The moment you select a directory with images in it, the images are loaded into the LightZone browser: thumbnails on the bottom third of the window, large preview on top.
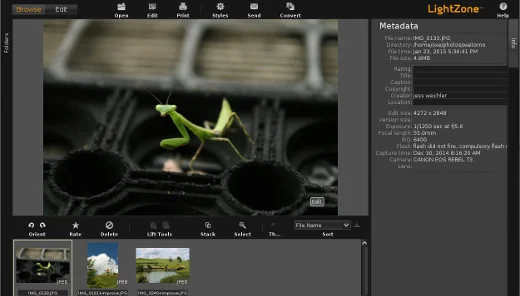
Lightzone browse mode screenshot

Lightzone browse mode

To view and work on RAW photos, you must have DCRaw libraries installed (just as for TIFF support, you need tiff libraries, and so on).

The thumbnail browser at the bottom of the window provides most of the functions you'd expect from a photo thumbnail viewer. Using the browser toolbar, you can adjust thumbnail size, rotate images, sort by file name, file size, or even metadata, such as your own rating, capture time, focal length, or aperture setting. Right-clicking on any thumbnail reveals even more actions, including the ability to rename, convert, and print the image.

A single-click on any thumbnail makes it the active selection. A control-click on two images brings both images up in the viewer, side by side, for easy comparison. You can view several images in your browser at a time (up to five on my display; after that, you may as well adjust the size of the thumbnails and view the photos that way).

Each preview image that appears in the top panel has an Edit button overlaid in the bottom right corner. To edit an image, click Edit on the photo, or click the Edit button in the upper left corner of the LightZone window to bring the active selection into the edit view.

Edit

In the edit (what you might think of as the "digital darkroom") view, the main areas of interest are:

  1. The left and right side panels hold presets and filter palettes. These are what you'll use to apply effects to your photograph.
  2. The center panel displays your image.

If you feel you need more room to work, hide panels using the vertical tabs on the left and right of the LightZone window.

Your workflow will probably start with the panel on the right. Underneath the Zones panel, there is a horizontal list of available filters. Any filter placed on a photograph appears in the filter stack underneath the filter list.

Filters

The filters in LightZone are, to me, a perfect mix of simple but must-have effects similar to those found in digiKam and Darktable, plus a few surprisingly powerful tools rivaling functions found in the likes of GIMP. For the former group, LightZone offers a zone mapper—like a levels filter, but from a more Ansel Adams perspective—hue and saturation control, sharpen and blur, white balance, color balance, and noise reduction. Each filter has a well-documented entry in LightZone's inbuilt user guide, and because they're non-destructive, you can try them without actually affecting your original photo.

Something that sets LightZone apart is that each of those "standard" filters also has a selection- and color-based constraint system, so any filter you apply can be done on only part of your image. Other applications can do that, but the fact that LightZone builds the option in on every default is a real time-saving convenience.
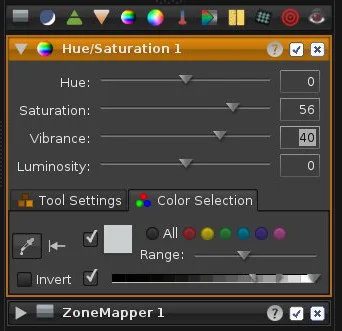
filters feature screenshot

LightZone filters

Another little surprise that LightZone ships with is the clone filter. By default, the clone filter clones an image and overlays it onto itself. This is great for interesting compositing effects, but it's even better once you clone parts of an image. Now you're compositing, just as you might in GIMP.

Presets

Each filter can have a preset—a temporary snapshot of a setting that you want to keep on hand, which is sort of a reverse-undo function. If you adjust a filter and get a result that you like, for example, you can create a preset by right-clicking on the filter icon in the filter's toolbar and selecting Remember Asset.

Then, imagine that you adjust the filter again but end up with something less appealing that you had before. You want to undo your changes, but you've been through a few iterations of each slider in the filter, so what would you undo? Of course, you wouldn't; instead, right-click on the filter icon in the filter's toolbar and select Apply Preset and all of your settings are set back to when you took the preset snapshot.

Styles

More complex than filters, and far more permanent, are Style. Whereas a preset lasts for only as long until you overwrite it with a more recent snapshot, a style gets saved to your LightZone configuration forever. Styles are also broader in scope; instead of just taking a snapshot of one filter's settings, a style can contain a whole stack of filters.

Preset styles are available in the left side panel. If the preset style options are not visible, click the Styles vertical tab to reveal it.

Hovering over a style displays your photo in the upper left corner, with that filter applied. Double-click the style name to apply the filters it contains to your photograph. Be warned, this adds filters to any filters you have already applied up to this point, so be sure to start with a clean slate if you want to see just the style's effect.
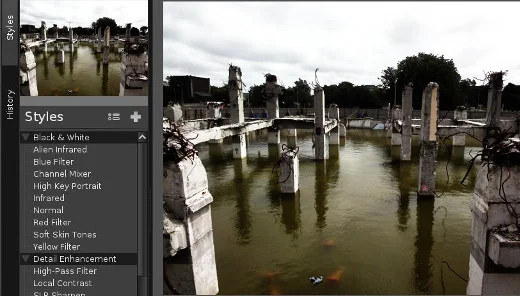
Styles screenshot

LightZone Styles

Any combination of filters can be saved as a Style with the Add a new Style button at the top of the window. By default, this gathers all current filters and settings from your currently active image and wraps them in a style.

Compare the contrast

To "flip back" to your original image as you edit, click and hold the Orig button in the top toolbar. Release to get back to your edit in progress.

History

The history palette on the left is an undo stack that persists while you work. When you leave Edit mode, your history goes away.
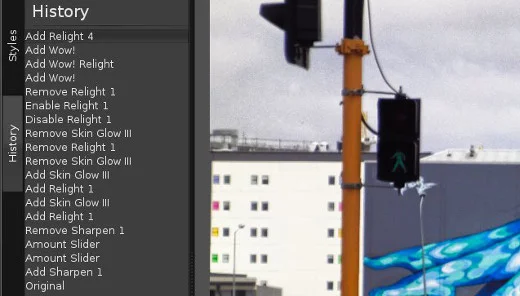
History view screenshot

History

Saving images

To save an image, click the Done button in the top toolbar. This option never overwrites your original photo; it saves a new version, differentiated by inserting lvn in the filename. The format that LightZone saves to is determined by your LightZone preferences.

Preferences

Go to the Edit menu and select Preferences to configure LightZone's default behavior. There are three tabs in the Preferences window:

  • General: Set how much RAM LightZone can use, the location of its scratch folder, the color profile of your display, and more.
  • Save: Default file format of saved (exported) images and associated options (compression levels, bit depth, ppi, and so on).
  • Copyright: The copyright and copyleft message to embed into exported images.
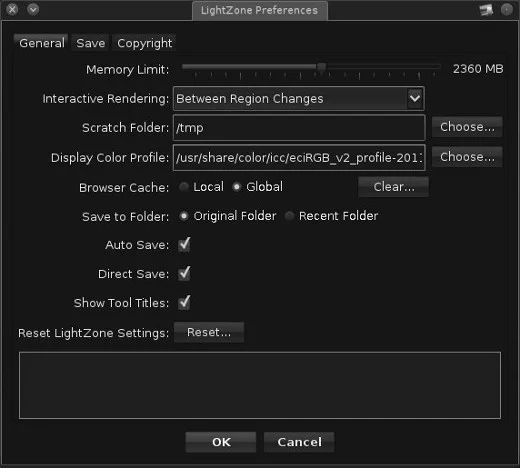
Preferences panel

Preferences

LightZone

LightZone is a capable and "prosumer"-level application—it's not quite as feature-rich as Darktable or digiKam, but it's not quite as simple as not as simplistic as something like FSpot. Being Java-based, LightZone is easy to install on all platform, ensuring a consistent workflow across all users. And the results speak for themselves.

Try LightZone out and let me know what you think of it.

Lead Image: 
old camera
Channel: 
Article Type: 
Default CC License: 

CC-BY-SA 4.0

Column: 
Multimedia Makers
up
2 readers like this

4 fun (and semi-useless) Linux toys

$
0
0

There are several minor tools and applications out there that keep popping up in my toolkit. You might not call any of them "killer apps," but darn it, they're fun to play around with and they sometimes take you in interesting directions. Some are creative and encourage productivity, and others just inspire creativity. Some are just plain silly.

Evolvotron

Do you like generative art? Evolvotron!

Do you like unsolvable puzzles? Evolvotron!

Does the click of a mouse and blink of lights hypnotize you? Evolvotron!

Yes, Evolvotron is an interactive generative art application for Linux that forces the evolution of texture and pattern. Simply put, it's the lava lamp of Linux.

Fact is, a lot of cool things can be done with Evolvotron. As random and wacky as it might seem, it's obviously creating images through computation. Evolvotron gives you access to everything, and not just in the sense that it's open source software; it's packed with hidden options.

Using Evolvotron appears simple at first. You open the application and click. This loads random renders of graphical patterns in a six-by-five matrix. Click again and a new matrix is calculated and formed based on the cell that you clicked. You can click any cell; sometimes it's fun to follow the path of the deviations, other times it's fun to follow the constant seed, and still others a random selection of any given spawn takes you in unexpected directions.

Evolvotron

That's the intro-level Evolvotron. The walk-in-the-park Evolvotron. But the pro Evolvotron artists (all three of them) bring in a little math.

The Settings menu of Evolvotron has several options that you can use to influence how Evolvotron generates its artwork. I have not traced back all the math in the source code, but from an artistic viewpoint, your options are:

  • Mutation parameters: Set the percentage of deviation from the base image. You can set these values manually or you can use descriptors, such as Heat, Cool, Shield, Irradiate, and so on. You can also toggle the Autocool feature, which controls how long the mutation endures.
  • Function weighting: Set the intensity of the mathematical functions at play. There must be at least a hundred functions spread across the Core set, plus Iterative, Fractal, Dilution, and more.
  • Favorite function: Define (or leave un-defined) the function you prefer the root image to start with.

If you see an image that you particularly like, right-click on it. From there, you can spawn new versions of the image, lock it into place, analyze the function that generated it, or enlarge it and save it as an work of collaborative art between you and math.

Evolvotron

Evolvotron is multi-threaded, but even so, some images may take longer than you expect to fully render. If you're trying to save an image and you get an error that it can't be saved yet, just be patient and save again later after the render is complete.

Fred's ImageMagick scripts

You know ImageMagick, whether you know it or not. It's the photo editor of the Unix shell; it processes images without the burden of a GUI interface. If you've ever uploaded a picture to an online forum or social network site and had the picture resized and cropped, you're quite possibly using ImageMagick indirectly.

Admittedly, it's probably not an afternoon's worth of fun to sit and run ImageMagick scripts on photos. But ImageMagick can be scripted, so it's trivial to run random ImageMagick functions on a directory full of photos overnight or during the day while you're away at work so that you can sit down at your computer and see what exciting accidental art you've managed to create.

To make that process a little less accidental, a guy named Fred Weinhaus maintains over 200 ImageMagick scripts available to use "for non-commercial use, ONLY." What gets defined as "commercial" is not terribly clear on his site (What if you don't intend to make money from using the script, but do? Can you make money from the resulting product of a script?), so their real-world usefulness depends on your interpretation of his restrictions (or your email correspondence with him, if in doubt).

However, as a fun diversion, the scripts definitely qualify.

Not all scripts are perfect, and not all produce the results you'll expect. They are easy to use, though, and being scripts, you can set them loose on a directory full of photos and come back hours later to sift through the results. Many scripts take quite a long time (they're complex!) and I haven't found a terribly graceful way to multi-thread them aside from launching dedicated processes.

Each script has its own -help command, so for syntax consult the script you are running. Here's an example using the vintage3 script:

$ ./vintage3 -T torn -L23-B33-M23 ./IMG_0559.JPG texture18.jpg oldboat.jpg

In this example, the options are placed at the front, with the input file plus a texture file (I use a picture of sand or dried mud to suggest film grain, but you can try anything), followed by the output target.

To "multi-thread" that on my desktop overnight on a directory, I just do something silly, like launching a separate command in three separate xterms (or rxvt tabs, if you prefer):

tab1_$ ./vintage3 -Blah blah blah ./IMG_???{0,1,2}.JPG texture18.jpg oldphoto-`date +%s`.JPGtab2_$ ./vintage3 -Blah blah blah ./IMG_???{3,4,5}.JPG texture18.jpg oldphoto-`date +%s`.JPGtab3_$ ./vintage3 -Blah blah blah ./IMG_???{6,7,8,9}.JPG texture18.jpg oldphoto-`date +%s`.JPG

The results are fun, and letting the photos process is a great way to spend CPU cycles that would otherwise go to waste. It's also a fun way to tax your computer for benchmarks and for learning more about photo manipulation.

Before.After.

Xaos

Have you ever tried to explain to someone what a fractal is? It's really difficult to describe, and I've found that rough sketches on napkins rarely capture the awe and wonder that a good Julia set inspires. With Xaos, you can stop describing fractals to your friends and just show them.

Xaos is one of those curious applications that looks pretty simple at first and then surprises you with a whole hidden secret world of options. For instance, when you launch Xaos, the first thing you see is a fairly run-of-the-mill Mandelbrot set. When I first discovered Xaos, that was good enough for me; I'd been searching for a fractal generator for years, so finding an application that actually rendered a fractal for me was worth the price of admission into the Linux world for me. However, if you poke around for a few moments, you learn that clicking and dragging on the fractal moves you closer to it, dynamically rendering the intricate details of the shape as you get closer.

If that's not enough, you'll find myriad options bound to both the onscreen menu (visible only when the mouse cursor is hovered near the top of the Xaos window), and several hotkeys. For instance, you can create your own Julia sets on-the-fly by pressing j, or change the type of set to render from the Fractal> Formulae menu. But that's just technical options. Xaos is all about rendering fractals, so there are plenty of options to change how the fractal is presented; change from 2D to pseudo-3D, alter the colors, force constant rotation, enable autopilot to fly you along the fractal's paths, add motion blur, and enter VJ mode so you can manipulate and control Xaos without text rendering for public presentation.

Xaos in pseudo-3d modeXaos in pseudo-3D mode.


Xaos is a fun and educational journey through fractal geometry. Try it out for fun, walk away a little smarter.

Netcat the band

With all this randomized art you'll be spending your time on, you'll want a little background music. Luckily, a geek-friendly band called Netcat released an album as a Linux kernel module on GitHub.

So, how exactly can an album be a kernel module? Well, the album, called Cycles Per Instruction, gets compiled into a kernel module (specifically, netcat.ko). When the module is added to your environment, it manifests itself as /dev/netcat. Piping the output of that "device" into a media player like ffplay plays the album.

If it sounds too amazing to be true, you're welcome to try it for yourself. The instructions are straightforward, but I'll reiterate them here with a few notes:

$ git clone https://github.com/usrbinnc/netcat-cpi-kernel-module.git
$ cd netcat*module
$ make-j4
$ su-c'insmod ./netcat.ko'
$ ffplay - </dev/netcat

I've successfully compiled and listened to this album on both a Linux 2.6.x series kernel and a 3.x kernel. The band's GitHub page recommends ogg123, but lately some users have reported playback issues. I found ffplay to solve the playback issue, but you can also try mpv, legacy mplayer, or others.

The album itself is beautiful. It's well worth a listen. It will, however, continue to play until you remove the module:

$ su-c'rmmod ./netcat.ko'

Open source randomness

There's so many more fun projects out there to explore, so don't let my modest list be the end of the adventure. Too often in the open source world, we suffer from people looking in, scrutinizing what we make, and seeking practical and clear paths toward monetization. But that's not what open source is about, really; open source is supposed to be fun and inspiring. It empowers everyone to follow their vaguest notion to completion, no matter how "useless" or "frivolous" it may be.

Take an afternoon or two and do something pointless. Have a go with a generative art application, write some code and see what it produces, play a geeky album, or make a geeky album. There are plenty of "toys" out there, and playing is what really drives innovation. Make some stuff and share it.

Lead Image: 
The fun and semi-useless toys of Linux
Tags: 
Channel: 
Article Type: 
Default CC License: 

CC-BY-SA 4.0

Series: 
Entertainment in Open Source
up
6 readers like this

Organize your movie and TV files with tinyMediaManager

$
0
0

The trouble with video files is that they are not easily parseable. How can your computer tell whether that 8 GB file in your ~/Movies folder is the latest superhero movie, or your daughter's soccer game?

I consider myself an early adopter of digital content. I prefer a digital format, and since I consume a lot of independent content that doesn't have the budget for physical releases anyway, most of my purchases are digital files. I keep these on an NFS shared drive, and stream to Kodi or ncmpcpp, or whatever media client I happen to be using on any given Linux or Android device.

I tried devising my own naming scheme for my files, but not all media clients handled that very gracefully; they attempted to parse the names and determine the content type based on file names, or they ignored the names entirely, or even ignored the files.

I did a little bit of research, and discovered that for well over a decade, a sort of unofficial standard had emerged for exactly this problem. In typical open source fashion, there are dozens of applications available to scan a media library and generate external metadata files and assets, so that the media clients could better parse all the crazy things you throw at it.

The media client I've been using lately is tinyMediaManager.

Getting tinyMediaManager

tinyMediaManager is an open source media management tool that generates video file metadata for media players like Kodi (formerly XBMC), and other clients that use the same metadata schema. It is written in Java with Swing libraries, so it runs on Linux, BSD, Windows, Mac OS, and anything else that supports Java.

After downloading the tinyMediaManager archive (it will be a tar.gz file if you're on Linux or BSD, and a zip file for all other platforms), unpack it to whatever path you prefer. I place my non-packaged applications in ~/bin, but it works just as well from /opt or /usr/local/bin; it's up to your own management style.

As with any Java application, a hard requirement of tinyMediaManager is Java, or more specifically either JDK or OpenJDK. On Linux or BSD, install one of these from your software repository or ports tree; other operating systems should visit the Java site for downloads.

Once Java has been installed, you can optionally add tinyMediaManager.desktop to /usr/share/applications so that it shows up in your applications menu. You may also launch it directly from a terminal with the included tinyMediaManager.sh script (which is what I do, since I only use it occasionally):

$ ~/bin/tmm/tinyMediaManager.sh &amp;

Getting started

When you first start tinyMediaManager, a setup wizard prompts you to provide it with a source that contains your video files, such as a local or network drive. Add your media location and then wait as tinyMediaManager scans the location.

tinyMediaManager startup

It may seem obvious, but in order for a network drive to be added as a source, that network drive must be mounted on your current machine. You can't just export the volume as NFS, or share it via Samba, and have it pop up in tinyMediaManager on another machine; the computer running tinyMediaManager must "see" the drive as a usable location. If you're not seeing your media drive in tinyMediaManager, make sure you see it on your client machine first!

The setup wizard also gives you a choice of the metadata format you want to generate. If you don't know, then it's probably safe to use the default.

The big parse

The reason you're running tinyMediaManager is to get titles and movie poster thumbnails instead of generic icons, or an endless list of "Unknowns", when you launch your media player. That means the next step is to identify all those video files on your drive.

To generate metadata, your media needn't be in any specific layout, but the closer you get your files to easily-parsed entities, the better. It helps, for example, to separate TV shows from movies. It also helps to recognise when something is too independent to be identified; you'll just have to sort through your obscure nerd indie collection yourself.

The very existence of digital media is, strangely, still a hotly debated topic, so there isn't really an industry-standard schema for naming and sorting. Schemata have emerged, and in my experience Kodi's preferred format is the leader.

Once tinyMediaManager lists the files it has found on your drive, click the magnifying lens icon in the top toolbar to start scraping the web for data.

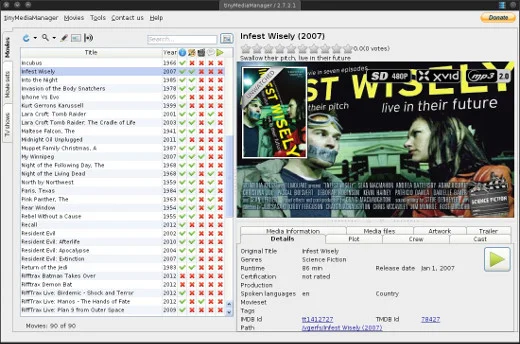
Kodi expects to find one movie per directory, with the directory title and the movie file it contains in the format of 'Movie Title (Year)'; for example, in a directory called 'Infest Wisely (2007)', I can place the movie file 'Infest Wisely (2007).webm', and half of tinyMediaManager's work is done. From that information, tinyMediaManager can accurately identify the movie, and then pull in all the data the web has to offer about it.

Kodi

When it is not provided with such explicit identification, tinyMediaManager makes every effort to parse whatever you do give it. It is pretty smart, and will propose titles that are close matches to your file names. Names like 'infestWisely-jimMunroe-anarchistSciFi-xvid-SD.mp4' might result in prompts for movies containing the words "infest" and "anarchist" and maybe a few others. Chances are good that one will be the right hit, and tinyMediaManager will let you choose which one to use.

tinyMediaManager pulls metadata from the web

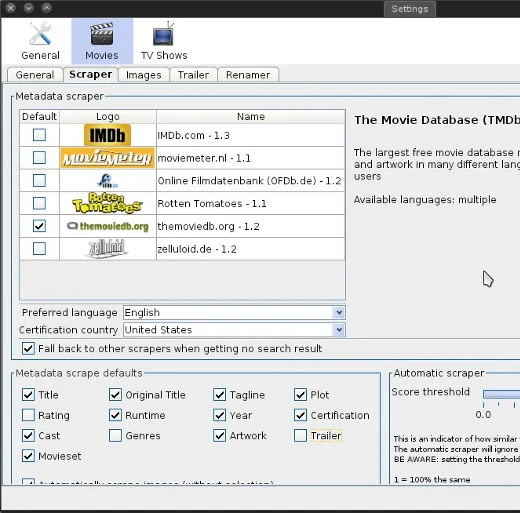
You can source metadata from a wide variety of websites, from the most obvious but not necessarily most reliable, such as IMDB.com, to lesser-known sites like themoviedb.org. For better results you can use more than one.

Selecting metadata sources.

In the tinyMediaManager > Settings panel, you can even choose what metadata you want to pull from the web. For instance, I opt out from pulling data about genre, trailers, or ratings.

Manual override

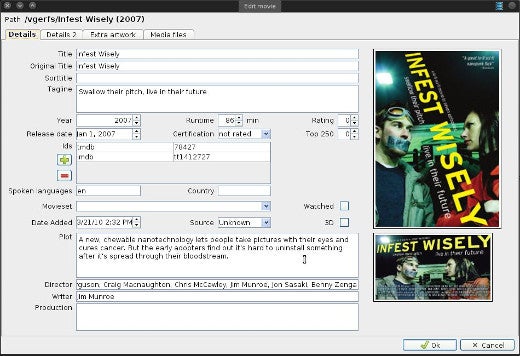
Some things cannot be identified; maybe you had to split a movie into two parts, or maybe you've done a fan re-edit of a film that you prefer to the original, or maybe you've made your own movie from scratch and the world has yet to discover it. In these cases, you can manually create your own metadata from within the tinyMediaManager interface.

Predictably, the Edit button is the pencil icon in the top toolbar. Select a movie to edit, and then click the Edit button to add or change information about any movie file.

Editing metadata.

All metadata about a movie or TV show is saved into the directory containing the media file. This preserves a natural association between a movie file and the data about that file, so there's no messy database required. (Although tinyMediaManager maintains a database for its own features.) It is all on your file system, independent of any media client, and human and computer parseable.

Cut, and print

The point of tinyMediaManager isn't necessarily to be a pedant about your movie collection. The end result of finally getting your movies and TV shows in order is that they look really nice when browsing your collection in your favorite media center.

There are, certainly, several other media management applications out there, including the terminal-centric Kolekto and MediaElch. tinyMediaManager balances nicely between providing the basic features, plus a few extras that make viewing your collection outside of Kodi (or your media center of choice) a pleasure.

Lead Image: 
tinyMediaManager catalogs your movie and TV files
Channel: 
Article Type: 
Default CC License: 

CC-BY-SA 4.0

Series: 
Entertainment in Open Source
up
3 readers like this

A simple menu system for blind Linux users

$
0
0

The Knoppix distribution goes back in time, to the era of text menus, to provide an interface for computer users who are blind.

Remember back when computers were driven mostly by text menus? Press:

    [Y] Yes, I remember.
    [N] No, that was before my time.
    [U] Unknown. Seems familiar but it's hazy.
    Enter your choice here: _

Yes, that sort of thing.

This isn't a trip down memory lane, but a proof of concept; this method of computing actually worked, and it worked well for many years. It was less asynchronous than modern interfaces, but that was largely because of random access memory constraints and CPU cycles than design. Once RAM became affordable and CPUs got more powerful, a proper Unix shell with the ability to launch subshells made the user experience more fluid than ever.

This old system of computing worked so well that many people strongly resisted the idea of a graphical make-believe "desktop" that they would have to interact with. Some people still do resist that idea; some are efficiency-obsessed Unix geeks, and others are people who cannot see the pretend desktops because they are blind.

It is the latter group that the venerable Knoppix distribution targets with its ADRIANE user interface.

Knoppix and ADRIANE

The Knoppix Linux distribution has existed since November 2000. It quickly grew in popularity because it was one of the first live operating systems available; you could boot from a CD and use Linux without actually installing it. The disc itself could be your operating system, as long as you saved your data to a hard drive or to a network share. At the time this was a groundbreaking idea, and it still is, given the lack of any such paradigm for non-open source operating systems (even an OS that has since developed a live-like environment for maintenance doesn't intend for you to use that boot disc as your OS).

Since live booting has become common, the clamour about Knoppix has died down, so the Knoppix team have not received much attention for developing a user interface based entirely on sound rather than visuals. It is specifically targeted at blind computer users, and is deliberately welcoming to non-technical users. This interface is called ADRIANE: Audio Desktop Reference Implementation and Networking Environment.

Using ADRIANE

As is the case with many operating systems, Knoppix and ADRIANE are probably not installable, at least not easily, by a blind user, because to get into ADRIANE a boot argument must be provided, and there is no audio prompt telling a user when the computer is ready for that. To be fair, I have yet to see a computer with blind-accessible BIOS (some EFI implementations are better), so getting a computer to boot from install media in the first place can be tricky.

To boot straight to ADRIANE rather than a traditional graphical desktop, enter the string

adriane

at the bootloader, and then press the Enter or Return key.

If you're installing Knoppix on the behalf of a blind user, this boot option can be pre-configured post-install so that the user doesn't have to type it in each boot, making the system self-sufficient.

ADRIANE is, simply, a menu system. By default, it offers:

  • Internet access through the ELinks text web browser.
  • Email.
  • Text recognition from scanned documents.
  • Multimedia playback, plus a custom YouTube interface.
  • Text editing with a custom interface built around GNU Nano.
  • File management.
  • Contact management.
  • SMS text messaging, for phone and service providers that support it.
  • Settings for all the usual computer preferences (volume, network, email settings).
  • Graphical fallback when a traditional screen reader is required.

ADRIANE has additional customizations.

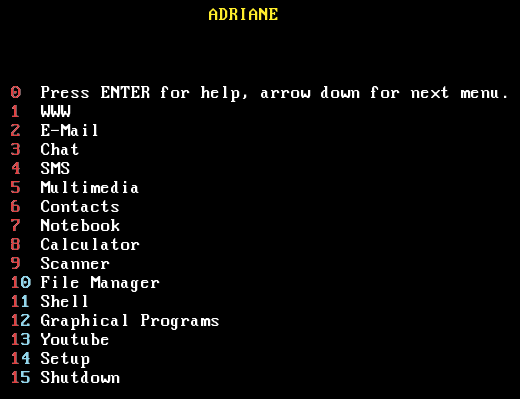
The first option in the ADRIANE menu is the HELP screen. This explains some of the extra navigational options of ADRIANE, mostly centering around the Caps Lock key. For instance, the Caps Lock + Spacebar prompts ADRIANE to read the current line (which ADRIANE does by default, but if you want to force a re-read, that is how it is done). Caps Lock + Up Arrow prompts ADRIANE to read the previous line, Caps + right arrow reads the current line character-by-character, and so on.

Normal navigation is as you would expect, using the arrow and Enter keys.

Design scheme

In a way, the overall design sensibility of the ADRIANE interface shares as much with old style text menus as it does with modern smart phones. For instance, the main ADRIANE menu serves as a kind of Home Screen, with the Escape key serving as a kind of universal Back button. To anyone who has used a web browser or a smart phone, the interface is familiar even though it is entirely unique to Knoppix.

ariadne interface

The applications underpinning ADRIANE are familiar to a daily Linux user. The text editor, for example, launches to a custom notepad-style management system. The default option is to create a new note, then GNU Nano launches, and you can write and edit in a fairly familiar and intuitive environment. Ctrl-x exits Nano and returns to the note manager, with options to edit the note that you've just written or start a new one. As always, the Escape key takes you back to the main menu.

Similarly, the email application is the popular keyboard-driven Mutt client, but its famously complex configuration is handled by ADRIANE Settings, with presets for popular email providers.

The result is a usable system with a custom audio interface that still uses familiar and well-supported applications. With the custom Caps Lock-based shortcuts, the system is cohesive and unified in ways that normally would not be achieved by randomly stringing applications together.

Usability

ADRIANE is a great interface with a solid plan for design and functionality. In a way, it reduces a computer down to a minimalist device tuned for the most common everyday tasks, so it might not be the ideal interface for power users (possibly an Emacspeak solution would be better for such users), but the important thing is that it makes the computer easy to use, and tends to keep the user informed every step of the way.

It's easy to try, and easy to demo, and Knoppix itself is a useful disc to have around, so if you have any interest in low-vision computer usage or in Linux in general, try Knoppix and ADRIANE.

Lead Image: 
A simple menu system for blind Linux users
Tags: 
Channel: 
Article Type: 
Default CC License: 

CC-BY-SA 4.0

up
10 readers like this

What is Git?

$
0
0

Welcome to my series on learning how to use the Git version control system! In this introduction to the series, you will learn what Git is for and who should use it.

If you're just starting out in the open source world, you're likely to come across a software project that keeps its code in, and possibly releases it for use, by way of Git. In fact, whether you know it or not, you're certainly using software right now that is developed using Git: the Linux kernel (which drives the website you're on right now, if not the desktop or mobile phone you're accessing it on), Firefox, Chrome, and many more projects share their codebase with the world in a Git repository.

On the other hand, all the excitement and hype over Git tends to make things a little muddy. Can you only use Git to share your code with others, or can you use Git in the privacy of your own home or business? Do you have to have a GitHub account to use Git? Why use Git at all? What are the benefits of Git? Is Git the only option?

So forget what you know or what you think you know about Git, and let's take it from the beginning.

What is version control?

Git is, first and foremost, a version control system (VCS). There are many version control systems out there: CVS, SVN, Mercurial, Fossil, and, of course, Git.

Git serves as the foundation for many services, like GitHub and GitLab, but you can use Git without using any other service. This means that you can use Git privately or publicly.

If you have ever collaborated on anything digital with anyone, then you know how it goes. It starts out simple: you have your version, and you send it to your partner. They make some changes, so now there are two versions, and send the suggestions back to you. You integrate their changes into your version, and now there is one version again.

Then it gets worse: while you change your version further, your partner makes more changes to their version. Now you have three versions; the merged copy that you both worked on, the version you changed, and the version your partner has changed.

As Jason van Gumster points out in his article, Even artists need version control, this syndrome tends to happen in individual settings as well. In both art and science, it's not uncommon to develop a trial version of something; a version of your project that might make it a lot better, or that might fail miserably. So you create file names like project_justTesting.kdenlive and project_betterVersion.kdenlive, and then project_best_FINAL.kdenlive, but with the inevitable allowance for project_FINAL-alternateVersion.kdenlive, and so on.

Whether it's a change to a for loop or an editing change, it happens to the best of us. That is where a good version control system makes life easier.

Git snapshots

Git takes snapshots of a project, and stores those snapshots as unique versions.

If you go off in a direction with your project that you decide was the wrong direction, you can just roll back to the last good version and continue along an alternate path.

If you're collaborating, then when someone sends you changes, you can merge those changes into your working branch, and then your collaborator can grab the merged version of the project and continue working from the new current version.

Git isn't magic, so conflicts do occur ("You changed the last line of the book, but I deleted that line entirely; how do we resolve that?"), but on the whole, Git enables you to manage the many potential variants of a single work, retaining the history of all the changes, and even allows for parallel versions.

Git distributes

Working on a project on separate machines is complex, because you want to have the latest version of a project while you work, makes your own changes, and share your changes with your collaborators. The default method of doing this tends to be clunky online file sharing services, or old school email attachments, both of which are inefficient and error-prone.

Git is designed for distributed development. If you're involved with a project you can clone the project's Git repository, and then work on it as if it was the only copy in existence. Then, with a few simple commands, you can pull in any changes from other contributors, and you can also push your changes over to someone else. Now there is no confusion about who has what version of a project, or whose changes exist where. It is all locally developed, and pushed and pulled toward a common target (or not, depending on how the project chooses to develop).

Git interfaces

In its natural state, Git is an application that runs in the Linux terminal. However, as it is well-designed and open source, developers all over the world have designed other ways to access it.

It is free, available to anyone for $0, and comes in packages on Linux, BSD, Illumos, and other Unix-like operating systems. It looks like this:

$ git --version
git version 2.5.3

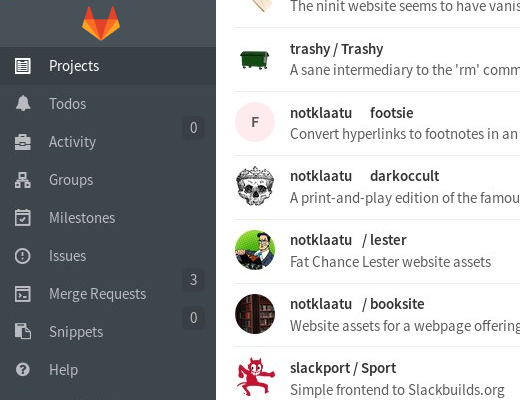
Probably the most well-known Git interfaces are web-based: sites like GitHub, the open source GitLab, SavannahBitBucket, and SourceForge all offer online code hosting to maximise the public and social aspect of open source along with, in varying degrees, browser-based GUIs to minimise the learning curve of using Git. This is what the GitLab interface looks like:

GitLab graphical Git interface.

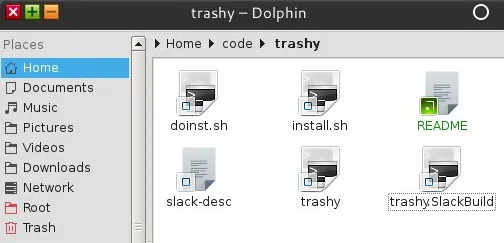
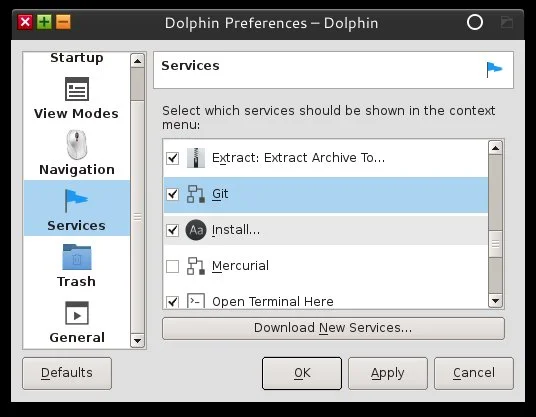
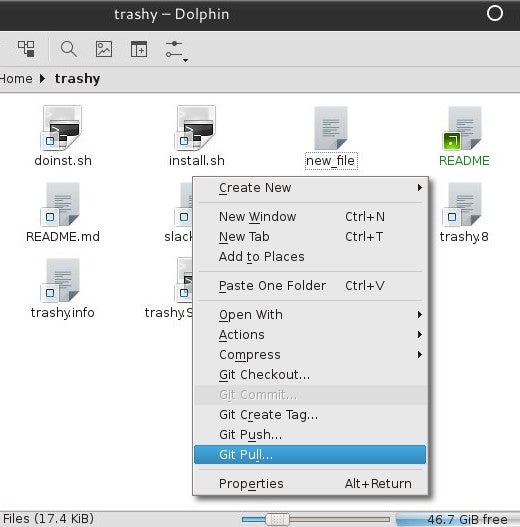
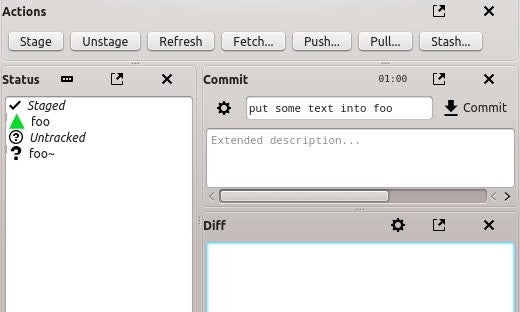
Additionally, it is possible that a Git service or independent developer may even have a custom Git frontend that is not HTML-based, which is particularly handy if you don't live with a browser eternally open. The most transparent integration comes in the form of file manager support. The KDE file manager, Dolphin, can show the Git status of a directory, and even generate commits, pushes, and pulls.

Dolphin

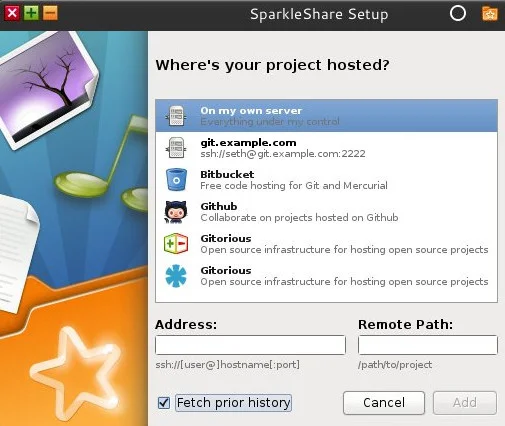
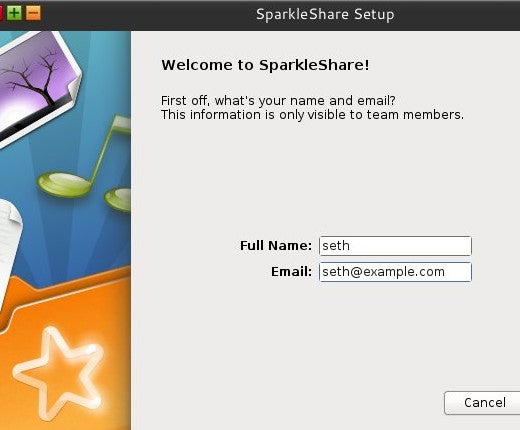
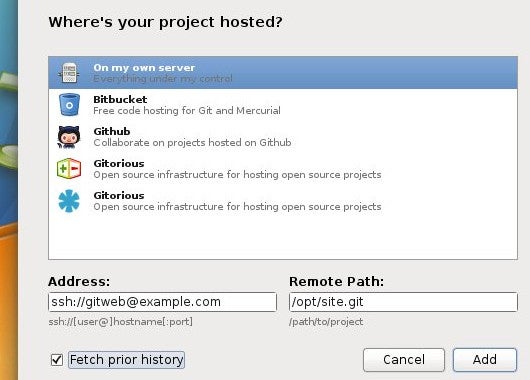
Sparkleshare uses Git as a foundation for its own Dropbox-style file sharing interface.

Sparkleshare screenshot

For more, see the (long) page on the official Git wiki listing projects with graphical interfaces to Git.

Who should use Git?

You should! The real question is when? And what for?

When should I use Git, and what should I use it for?

To get the most out of Git, you need to think a little bit more than usual about file formats.

Git is designed to manage source code, which in most languages consists of lines of text. Of course, Git doesn't know if you're feeding it source code or the next Great American Novel, so as long as it breaks down to text, Git is a great option for managing and tracking versions.

But what is text? If you write something in an office application like Libre Office, then you're probably not generating raw text. There is usually a wrapper around complex applications like that which encapsulate the raw text in XML markup and then in a zip container, as a way to ensure that all of the assets for your office file are available when you send that file to someone else. Strangely, though, something that you might expect to be very complex, like the save files for a Kdenlive project, or an SVG from Inkscape, are actually raw XML files that can easily be managed by Git.

If you use Unix, you can check to see what a file is made of with the file command:

$ file ~/path/to/my-file.blah
my-file.blah: ASCII text
$ file ~/path/to/different-file.kra: Zip data (MIME type "application/x-krita")

If unsure, you can view the contents of a file with the head command:

$ head ~/path/to/my-file.blah

If you see text that is mostly readable by you, then it is probably a file made of text. If you see garbage with some familiar text characters here and there, it is probably not made of text.

Make no mistake: Git can manage other formats of files, but it treats them as blobs. The difference is that in a text file, two Git snapshots (or commits, as we call them) might be, say, three lines different from each other. If you have a photo that has been altered between two different commits, how can Git express that change? It can't, really, because photographs are not made of any kind of sensible text that can just be inserted or removed. I wish photo editing were as easy as just changing some text from "<sky>ugly greenish-blue</sky>" to "<sky>blue-with-fluffy-clouds</sky>" but it truly is not.

People check in blobs, like PNG icons or a speadsheet or a flowchart, to Git all the time, so if you're working in Git then don't be afraid to do that. Know that it's not sensible to do that with huge files, though. If you are working on a project that does generate both text files and large blobs (a common scenario with video games, which have equal parts source code to graphical and audio assets), then you can do one of two things: either invent your own solution, such as pointers to a shared network drive, or use a Git add-on like Joey Hess's excellent git annex, or the Git-Media project.

So you see, Git really is for everyone. It is a great way to manage versions of your files, it is a powerful tool, and it is not as scary as it first seems.

Lead Image: 
What is Git?
Channel: 
Article Type: 
Default CC License: 

CC-BY-SA 4.0

up
12 readers like this

Getting started with Git

$
0
0

In the introduction to this series we learned who should use Git, and what it is for. Today we will learn how to clone public Git repositories, and how to extract individual files without cloning the whole works.

Since Git is so popular, it makes life a lot easier if you're at least familiar with it at a basic level. If you can grasp the basics (and you can, I promise!), then you'll be able to download whatever you need, and maybe even contribute stuff back. And that, after all, is what open source is all about: having access to the code that makes up the software you run, the freedom to share it with others, and the right to change it as you please. Git makes this whole process easy, as long as you're comfortable with Git.

So let's get comfortable with Git.

Read and write

Broadly speaking, there are two ways to interact with a Git repository: you can read from it, or you can write to it. It's just like a file: sometimes you open a document just to read it, and other times you open a document because you need to make changes.

In this article, we'll cover reading from a Git repository. We'll tackle the subject of writing back to a Git repository in a later article.

Git or GitHub?

A word of clarification: Git is not the same as GitHub (or GitLab, or Bitbucket). Git is a command-line program, so it looks like this:

$ git
usage: Git [--version] [--help] [-C <path>]
  [-p | --paginate | --no-pager] [--bare]
  [--Git-dir=<path>] <command> [<args>]

As Git is open source, lots of smart people have built infrastructures around it which, in themselves, have become very popular.

My articles about Git teach pure Git first, because if you understand what Git is doing then you can maintain an indifference to what front end you are using. However, my articles also include common ways of accomplishing each task through popular Git services, since that's probably what you'll encounter first.

Installing Git

To install Git on Linux, grab it from your distribution's software repository. BSD users should find Git in the Ports tree, in the devel section.

For non-open source operating systems, go to the project site and follow the instructions. Once installed, there should be no difference between Linux, BSD, and Mac OS X commands. Windows users will have to adapt Git commands to match the Windows file system, or install Cygwin to run Git natively, without getting tripped up by Windows file system conventions.

Afternoon tea with Git

Not every one of us needs to adopt Git into our daily lives right away. Sometimes, the most interaction you have with Git is to visit a repository of code, download a file or two, and then leave. On the spectrum of getting to know Git, this is more like afternoon tea than a proper dinner party. You make some polite conversation, you get the information you need, and then you part ways without the intention of speaking again for at least another three months.

And that's OK.

Generally speaking, there are two ways to access Git: via command line, or by any one of the fancy Internet technologies providing quick and easy access through the web browser.

Say you want to install a trash bin for use in your terminal because you've been burned one too many times by the rm command. You've heard about Trashy, which calls itself "a sane intermediary to the rm command", and you want to look over its documentation before you install it. Lucky for you, Trashy is hosted publicly on GitLab.com.

Landgrab

The first way we'll work with this Git repository is a sort of landgrab method: we'll clone the entire thing, and then sort through the contents later. Since the repository is hosted with a public Git service, there are two ways to do this: on the command line, or through a web interface.

To grab an entire repository with Git, use the git clone command with the URL of the Git repository. If you're not clear on what the right URL is, the repository should tell you. GitLab gives you a copy-and-paste repository URL for Trashy.

GitLab shows the repo URL.

You might notice that on some services, both SSH and HTTPS links are provided. You can use SSH only if you have write permissions to the repository. Otherwise, you must use the HTTPS URL.

Once you have the right URL, cloning the repository is pretty simple. Just git clone the URL, and optionally name the directory to clone it into. The default behaviour is to clone the git directory to your current directory; for example, 'trashy.git' gets put in your current location as 'trashy'. I use the .clone extension as a shorthand for repositories that are read-only, and the .git extension as shorthand for repositories I can read and write, but that's not by any means an official mandate.

$ git clone https://gitlab.com/trashy/trashy.git trashy.clone
Cloning into 'trashy.clone'...
remote: Counting objects: 142, done.
remote: Compressing objects: 100% (91/91), done.
remote: Total 142 (delta 70), reused 103 (delta 47)
Receiving objects: 100% (142/142), 25.99 KiB | 0 bytes/s, done.
Resolving deltas: 100% (70/70), done.
Checking connectivity... done.

Once the repository has been cloned successfully, you can browse files in it just as you would any other directory on your computer.

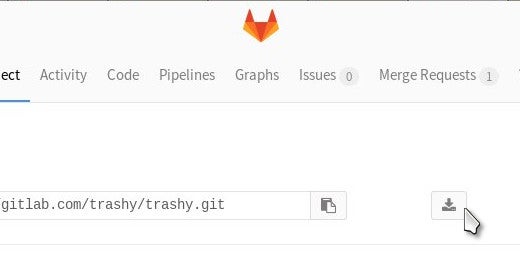
The other way to get a copy of the repository is through the web interface. Both GitLab and GitHub provide a snapshot of any repository in a .zip file. GitHub has a big green download button, but on GitLab, look for an inconspicuous download button on the far right of your browser window:

GitLab&amp;#039;s zip download button.

Pick and choose

An alternate method of obtaining a file from a Git repository is to find the file you're after and pluck it right out of the repository. This method is only supported via web interfaces, which is essentially you looking at someone else's clone of a repository; you can think of it as a sort of HTTP shared directory.

The problem with using this method is that you might find that certain files don't actually exist in a raw Git repository, as a file might only exist in its complete form after a make command builds the file, which won't happen until you download the repository, read the README or INSTALL file, and run the command. Assuming, however, that you are sure a file does exist and you just want to go into the repository, grab it, and walk away, you can do that.

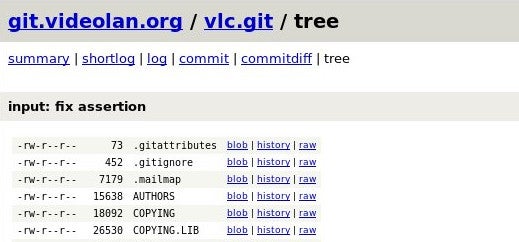
In GitLab and GitHub, click the Files link for a file view, view the file in Raw mode, and use your web browser's save function, e.g. in Firefox, File > Save Page As. In a GitWeb repository (a web view of personal git repositories used some who prefer to host git themselves), the Raw view link is in the file listing view.

Save file in WebGit.

Best practices

Generally, cloning an entire Git repository is considered the right way of interacting with Git. There are a few reasons for this. Firstly, a clone is easy to keep updated with the git pull command, so you won't have to keep going back to some web site for a new copy of a file each time an improvement has been made. Secondly, should you happen to make an improvement yourself, then it is easier to submit those changes to the original author if it is all nice and tidy in a Git repository.

For now, it's probably enough to just practice going out and finding interesting Git repositories and cloning them to your drive. As long as you know the basics of using a terminal, then it's not hard to do. Don't know the basics of terminal usage? Give me five more minutes of your time.

Terminal basics

The first thing to understand is that all files have a path. That makes sense; if I told you to open a file for me on a regular non-terminal day, you'd have to get to where that file is on your drive, and you'd do that by navigating a bunch of computer windows until you reached that file. For example, maybe you'd click your home directory > Pictures > InktoberSketches > monkey.kra.

In that scenario, we could say that the file monkeysketch.kra has the path $HOME/Pictures/InktoberSketches/monkey.kra.

In the terminal, unless you're doing special sysadmin work, your file paths are generally going to start with $HOME (or, if you're lazy, just the ~ character) followed by a list of folders up to the filename itself. This is analogous to whatever icons you click in your GUI to reach the file or folder.

If you want to clone a Git repository into your Documents directory, then you could open a terminal and run this command:

$ git clone https://gitlab.com/foo/bar.git $HOME/Documents/bar.clone

Once that is complete, you can open a file manager window, navigate to your Documents folder, and you'll find the bar.clone directory waiting for you.

If you want to get a little more advanced, you might revisit that repository at some later date, and try a git pull to see if there have been updates to the project:

$ cd $HOME/Documents/bar.clone
$ pwd
bar.clone
$ git pull

For now, that's all the terminal commands you need to get started, so go out and explore. The more you do it, the better you get at it, and that is, at least give or take a vowel, the name of the game.

Lead Image: 
Getting started with Git
Tags: 
Channel: 
Article Type: 
Default CC License: 

CC-BY-SA 4.0

up
3 readers like this

Writing screenplays with Linux and open source tools

$
0
0

Back in May of this year, Jason van Gumster wrote 4 open source tools for writing your next screenplay. It includes some tools I'd never heard of before, some tools I was very familiar with, and it was missing some tools that I myself loved. I thought a companion article might be of interest to our fellow screenwriters out there, with a closer look at some of the screenplay tools that Jason mentioned and a spotlight on some of the tools that I've uncovered (or created) myself.

For years (and in fact, to this very day), young artists are told that if they're "serious" about their art, they'll use a very specific set of tools. Those tools are, conveniently, the products of specific vendors. And while a student discount may apply at first, eventually the full price kicks in. Before you know it, you're beholden to that application forever.

Amazingly, something as simple as typing the text of a screenplay is subject to the exact same marketing push: you're told to use a specific application or a specific cloud service if you want to be taken "seriously." But the truth is, once a screenplay is printed out on white and pink and yellow and blue pages, as long as it's formatted correctly it's just text that could have been typed into any application. And let's face it: If there's one thing Linux has in abundance, it's text editors.

Screenplay formatting

Screenplay formatting matters. In fact, it's an industry rule of thumb that one page of screenplay equates to one minute of screen time, and films are shot in divisions of page eighths. If an eighth of a page contains too much, that gives an unfair expectation of what needs to get shot in one session. There's a delicate balance to be had, and that's why screenplay formatting has evolved into the funky, off-centered layout it retains to this day.

While you can, technically, type a screenplay and format it manually, screenwriters tend to prefer to have an application that manages margins and some basic capitalization automatically. If the application also has features to help manage names of places and people, then that's an added bonus.

If you're a traditionalist, though, you're welcome to set your tabs and develop styles for LibreOffice yourself. In a nutshell:

  • Courier 12pt font
  • 1.5" left and right margins
  • 2.5" left and right margins for dialogue

Assuming you're looking for something less manual, there are three screenplay applications that make open source screenwriting a breeze.

Fonts

The preferred font for screenplays is, very strictly speaking, Courier at 12 points. Courier was designed a long time ago at IBM, and there have been several incarnations of it. Most people's experience with Courier comes from the Courier font (usually Courier 10 Pitch) that comes bundled with their operating system, but that specific .ttf file is probably technically under copyright. An open source Courier typeface has been provided by Alan Dague-Greene for screenwriter John August and is called Courier Prime.

You should download it and use it, especially for your screenplays.

Trelby

If you got trained on closed source screenwriting tools in film school or adopted a once-open source application that has since moved to a closed source cloud-based model, then you're probably looking for Trelby (whether you know you are or not).

Trelby runs on Linux and Windows and is written in Python with the wxPython framework. If you don't already have wxPython installed, you can get it from PyPi, the Python packaging service, or from your distribution's repository.

If you're running Ubuntu or similar distributions, you should be able to install Trelby from its downloadable .deb package. Otherwise, download the generic tarball, unarchive it to /opt, and use it from there. The exact steps (where X and Y are the major and minor version numbers):

$ sudowget-qO- \
http://trelby.org/files/release/X.Y/trelby-X.Y.tar.gz \|tar-C ./opt/-xvz trelby-X.Y/trelby --strip1
$ sudomv/opt/trelby/trelby.desktop \/usr/share/applications

Launch as usual.

Modern conveniences

Trelby is, basically, a perfect application. It's got all the must-have features, a few of the nice-to-haves, none of the bloat, and it's written to be smart, to stay out of your way, and to treat your data with respect. It's like a typewriter with a brain—and without the attitude.

When you first launch Trelby, click the Settings icon in the left toolbar, or navigate to File> Settings> Change.

In the Settings window, click the Display category in the left column. If Trelby has not auto-detected your Courier font, then set all typefaces to Courier Prime at 12 points.

Remember the Courier Prime directive

Remember the Courier Prime directive.

With your fonts sorted, the only thing left to do is write. Trelby takes care of the mundane formatting for you; a typical start to a screenplay (after the obligatory FADE IN:) is a slug line. That's a fancy term for the setting (the in-world representation of the location). A slug line is written in all capital letters, and it always starts with either EXT. for exterior or INT. for interior. As long as you capitalize the first three letters, Trelby auto-detects that you're typing a slug line, or "scene heading," and retains the capital letters and bold typeface for the duration of the line.

Slug line

Slug line

After a slug is usually stage direction (or "action"); that is, non-dialogue text. Trelby assumes this to be the case, and drops into standard type after you hit Return.

When you need to override the action style setting, you can either force a new slug by typing EXT. or INT., or else add in some dialogue (films apparently have sound now, and by all accounts it's fontcatching on).

To enter dialogue mode, press Tab. This moves your cursor inward for the standard character name indentation and forces capital letters. On the next line, the indent is adjusted further so that you can type your dialogue block.

Talkies are a fad

Talkies are a fad

Another Tab exits dialogue mode and returns you to normal entry. As usual, typing produces action and an appropriate prefix produces a slug.

An element for every occasion

The scene, action, and dialogue element types cover about 95% of your screenwriting needs, but there are other entry types that screenplays use, the greatest of which is the transition. The extra element types can be entered via a right-click, or via ALT keyboard shortcuts, documented in Settings> Change> Keyboard (look for ChangeTo actions, which switch to a specific mode at a blank line, and convert text if on a line already containing text).

To be fair, the transition is mostly decorative at this point; CUT TO: is pretty much assumed (traditionally, it differentiated between a physical cut and a dissolve, which is an optical effect and cost more money), and you don't really mean FADE IN and FADE OUT necessarily, but they're the "Once upon a time..." and "...and they lived happily ever after" of screenplays.

Other element types are less common, and usually the less specific and less exact you are in a screenplay, the better. Screenplays are blueprints for a story, not for acting or editing, so less is usually considered to be more.

Title page

Like everything else in the screenplay world, there's a certain look and feel expected from a title page. Admittedly, in practice it does vary, but the basic title page is pretty iconic[ally simple].

Behold, the title page

Behold, the title page

To create your own title page, navigate to the Script menu > Title pages.

Bonus points

A funny thing about screenplays is that no matter how much you work on it, you'll never quite recall how you finally decided to spell that bit player's name, or that one location that you used way in the beginning just so you could bring it back in the end. Historically, you'd have had to flip back through the pages, frantically searching for an answer, as your muse slowly faded from your grasp.

No more! With modern applications like Trelby, your screenplay is granted a character name and location database. Typing either a location in a slug line or a character at the start of dialogue brings up an auto-complete function so you can choose from the correct entry as needed.

Can't think of a name in the first place? Trelby has that covered, too. Gone are the days of opening up a browser and navigating to ad-ridden "What to name your baby" sites. Trelby has a built-in name database classified by gender and ethnicity.

What's more is that you can even generate reports from Trelby, so you (or the pre-production office) can have a quick reference about what parts are needed in the film, how big the parts are (in terms of lines and percentage of dialogue), and locations.

As your screenplay gets longer and more complex, navigation can become daunting. Trelby helps you find your way around by providing navigation by scene number (Alt-G) or page number (Ctrl-G). You can also select entire blocks of text by scene, making re-working your script just a little bit easier.

In short, there are plenty of features in Trelby for even the most hard-boiled screenwriter, and best of all, there are no more features than such a screenwriter would want. No more silly features no one actually uses, no more proprietary save file formats, and no more licensing problems.

Fountain

On the opposite end of the spectrum is the option to not use a screenplay editor at all, and in fact not even bother formatting what you write. Sound crazy? It may well be, but it's the good kind of crazy, and it's called Fountain.

Fountain is not an editor, but a markdown format. To write in the Fountain format, all you need is a plain text editor, like Gedit or Atom, and to adhere to these simple formatting rules:

  • Slugs are capitalized (as usual)
  • Character headings for dialogue are capitalized and terminated with a newline (as usual). No whitespace between the character name and the dialogue block. No whitespace between dialogue paragraphs, only newlines.
  • Action blocks are separated by one blank line
  • Transitions get placed in **double asterisks**

That's all there is to it. If you write with those rules in mind, then you have produced a Fountain markdown file.

It looks a little something like this:

**FADE IN:** 
INT. FACTORY - DAY 
It's still daylight. Or is it? Through the
thick black smoke and the crowd of sweating
bodies, it's hard to tell. 
FOREMAN
Git on with it, we're not paying you to stand
around gaping at the ceiling. 
The worker, STAN, looks one-and-two-thirds his
age. He wipes sweat from his brow, then looks
at his sleeve. 
Blood. 
The stigmata. It's back.

As you can see, it looks and feels like a screenplay even though it lacks the proper formatting.

To produce a fancy industry-style title page, some markup is required. It's not complex, but it should appear at the top of your screenplay:

Title:  The Stigmata of Stan
Credit: written by
Author: Seth Kenlon
Source: based on the novel by Seth Kenlon
Notes:
        FIRST DRAFT
    Copyleft: CC-BY-SA Seth Kenlon 
A story of the Great Depression, and how a guy named
Stan accidentally invents microprocessors and becomes
a messiah of a technological apocalypse.. 
==== 
**Fade In:** 
INT. FACTORY - DAY

The advantage to Fountain is that you don't have to think at all about where your cursor is on the page as long as you can hit the Return key as you normally would in any text document. The disadvantage is that you have less sense of how much you've actually written. Text that spans a full screen text editor is a lot different when constrained between 5" margins. But with experience and frequent checks, you can develop a feel for page length.

Fountain in Trelby

What can you do with a Fountain file? You convert it to a screenplay using any one of many Fountain converters.

One converter, we've already covered: Yes, Trelby can import and format a .fountain file. Just launch Trelby and select File> Import and choose the file. It helps if you use the extension .fountain.

Barefoot in the Fountain

Another converter is the cross-platform shell command Barefoot. Written in C++, this command does need to be compiled (as far as I know, it's not in any Linux repository yet), but the compiling process is simple on Linux.

On Slackware:

$ g++-I/usr/include/boost/
barefoot.cpp -o barefoot-L/usr/lib64/ -lboost_regex

Or on Fedora:

$ g++-I/usr/include/boost/ \
barefoot.cpp -o barefoot \-L/usr/lib/ -lboost_regex

The result of such a command is the barefoot executable, which you can place in $HOME/bin (if you have one) or /usr/local/bin, and then run from a terminal.

Barefoot does one thing: it converts .fountain screenplay files to formatted text. That means you can use it as a single command:

$ barefoot ~/my.fountain &gt; movie.txt

Or you can use it in a larger pipeline:

$ barefoot myScreenplay.fountain \|pr-f-t| text2pdf &gt; \
myScreenplay.pdf

And so on.

There are dozens of converters for Fountain, so whatever workflow you need, there's probably an application to suit.

Screenwriter-Mode

A happy medium, perhaps, between the GUI application Trelby, and the non-application that is Fountain, is the Emacs screenwriter-mode.

The concept is very similar to Trelby: keyboard shortcuts allow you to write a few different elements. There are key bindings for all types; the new user and the Emacs veterans:

  • alt-t or ctrl-c t to enter a transition
  • alt-s or ctrl-c s to enter a slug line
  • alt-a or ctrl-c a for action
  • alt-d or ctrl-c d for dialogue blocks

Generally, screenwriter-mode is about as automated as Trelby in terms of flow; it doesn't auto-detect a slug line, but since there's really no difference between action and a slug aside from capitalization, you can actually just type without ever switching to a "slug line element". Screenwriter-mode doesn't deal in metadata the way Trelby does; all c-c s or alt-s does is convert text to capitals.

Emacs screenwriter-mode

Emacs screenwriter-mode

More useful are the transition and character dialogue elements. These both involve complex indentation, so entering those entry modes is genuinely helpful. Like Trelby, new lines leave the modes and return to the default action entry.

Emacs being what it is, there are all kinds of convenience tools that you can tap into to manage location and character names. I use auto-complete but the choices are numerous.

The main advantage of screenwriter-mode is that it's cross-platform (anything that Emacs runs on, and that's practically everything) also runs screenwriter-mode. This means that you have a consistent screenwriting environment no matter what, and since Emacs also runs quite nicely in a terminal, you don't even need a GUI to write your masterpiece (how's that for distraction-free typing?).

Unix at the Movies

Screenwriter-mode, like Fountain, produces plain text files; there's no meta-data or special file format. Unlike Fountain, no conversion is required. Aside from ease of formatting, screenwriter-mode has no extra features like Trelby has, although for pre-production work, a plain text workflow is just as powerful.

Screenwriter-mode ships with several shell scripts for common screenplay-related tasks. The screenplay-character script produces a report of all characters required by the script. Screenplay-location prints a report of locations. Screenplay-title produces a title page.

Unlike Trelby, there's no shortcut, exactly, to go to a specific scene number, or any menu option to select an entire scene. Writing a screenplay, however, in a modular fashion solves these problems; save each scene into a separate file so that you can move them around as needed, and then use the screenplay-build to produce a single file with cat, and screenplay-print to provide page numbers and to print with the pr command.

Script changes is something that is notoriously difficult to manage (mostly difficult for the humans, but sometimes for software, too), but a plain text workflow handles it with ease. Just as with source code, screenplays go through several revisions even while in production. Since page and scene numbers get frozen once a script goes into production, this presents an interesting puzzle; how can you add a page to your script without throwing off the pages already scheduled?

The answer is to print revised pages on their own page with a unique number (23, 23a, 23b, and so on), and often on color-coded paper (pink paper for first revisions, yellow for second, and so on). With plain text, such inserts are trivial thanks to diff.

Fade out

It seems silly to remind people that Linux can even edit text, but screenwriting is a niche industry with quirky requirements. People sometimes assume that open source doesn't have tools for the lesser markets (especially the creative ones), but luckily there are creative people who are invested in open source, too. Between Trelby, Fountain, and Emacs Screenwriter-mode, those among us with a story to tell and fingers itching to type have nothing to worry about.

Lead Image: 
Writing screenplays with Linux and open source tools
Channel: 
Article Type: 
Default CC License: 

CC-BY-SA 4.0

Column: 
Multimedia Makers
up
8 readers like this

Creating your first Git repository

$
0
0

Read:

Now it is time to learn how to create your own Git repository, and how to add files and make commits.

In the previous installments in this series, you learned how to interact with Git as an end user; you were the aimless wanderer who stumbled upon an open source project's website, cloned a repository, and moved on with your life. You learned that interacting with Git wasn't as confusing as you may have thought it would be, and maybe you've been convinced that it's time to start leveraging Git for your own work.

While Git is definitely the tool of choice for major software projects, it doesn't only work with major software projects. It can manage your grocery lists (if they're that important to you, and they may be!), your configuration files, a journal or diary, a novel in progress, and even source code!

And it is well worth doing; after all, when have you ever been angry that you have a backup copy of something that you've just mangled beyond recognition?

Git can't work for you unless you use it, and there's no time like the present. Or, translated to Git, "There is no push like origin HEAD". You'll understand that later, I promise.

The audio recording analogy

We tend to speak of computer imaging in terms of snapshots because most of us can identify with the idea of having a photo album filled with particular moments in time. It may be more useful, however, to think of Git more like an analogue audio recording.

A traditional studio tape deck, in case you're unfamiliar, has a few components: it contains the reels that turn either forward or in reverse, tape to preserve sound waves, and a playhead to record or detect sound waves on tape and present them to the listener.

In addition to playing a tape forward, you can rewind it to get back to a previous point in the tape, or fast-forward to skip ahead to a later point.

Imagine a band in the 1970s recording to tape. You can imagine practising a song over and over until all the parts are perfect, and then laying down a track. First, you record the drums, and then the bass, and then the guitar, and then the vocals. Each time you record, the studio engineer rewinds the tape and puts it into loop mode so that it plays the previous part as you play yours; that is, if you're on bass, you get to hear the drums in the background as you play, and then the guitarist hears the drums and bass (and cowbell) and so on. On each loop, you play over the part, and then on the following loop, the engineer hits the record button and lays the performance down on tape.

You can also copy and swap out a reel of tape entirely, should you decide to do a re-mix of something you're working on.

Now that I've hopefully painted a vivid Roger Dean-quality image of studio life in the 70s, let's translate that into Git.

Create a Git repository

The first step is to go out and buy some tape for our virtual tape deck. In Git terms, that's the repository ; it's the medium or domain where all the work is going to live.

Any directory can become a Git repository, but to begin with let's start a fresh one. It takes three commands:

  • Create the directory (you can do that in your GUI file manager, if you prefer).
  • Visit that directory in a terminal.
  • Initialise it as a directory managed by Git.

Specifically, run these commands:

$ mkdir ~/jupiter  # make directory
$ cd ~/jupiter     # change into the new directory
$ git init .       # initialise  your new Git repo

Is this example, the folder jupiter is now an empty but valid Git repository.

That's all it takes. You can clone the repository, you can go backward and forward in history (once it has a history), create alternate timelines, and everything else Git can normally do.

Working inside the Git repository is the same as working in any directory; create files, copy files into the directory, save files into it. You can do everything as normal; Git doesn't get involved until you involve it.

In a local Git repository, a file can have one of three states:

  • Untracked: a file you create in a repository, but not yet added to Git.
  • Tracked: a file that has been added to Git.
  • Staged: a tracked file that has been changed and added to Git's commit queue.

Any file that you add to a Git repository starts life out as an untracked file. The file exists on your computer, but you have not told Git about it yet. In our tape deck analogy, the tape deck isn't even turned on yet; the band is just noodling around in the studio, nowhere near ready to record yet.

That is perfectly acceptable, and Git will let you know when it happens:

$ echo "hello world"> foo
$ git status
On branch master
Untracked files:
(use "git add <file>..." to include in what will be committed)
    foo
nothing added but untracked files present (use "git add" to track)

As you can see, Git also tells you how to start tracking files.

Git without Git

Creating a repository in GitHub or GitLab is a lot more clicky and pointy. It isn't difficult; you click the New Repository button and follow the prompts.

It is a good practice to include a README file so that people wandering by have some notion of what your repository is for, and it is a little more satisfying to clone a non-empty repository.

Cloning the repository is no different than usual, but obtaining permission to write back into that repository on GitHub is slightly more complex, because in order to authenticate to GitHub you must have an SSH key. If you're on Linux, create one with this command:

$ ssh-keygen

Then copy your new key, which is plain text. You can open it in a plain text editor, or use the cat command:

$ cat ~/.ssh/id_rsa.pub

Now paste your key into GitHub's SSH configuration,  or your GitLab configuration.

As long as you clone your GitHub project via SSH, you'll be able to write back to your repository.

Alternately, you can use GitHub's file uploader interface to add files without even having Git on your system.

GitHub file uploader.

Tracking files

As the output of git status tells you, if you want Git to start tracking a file, you must git add it. The git add action places a file in a special staging area, where files wait to be committed, or preserved for posterity in a snapshot. The point of a git add is to differentiate between files that you want to have included in a snapshot, and the new or temporary files you want Git to, at least for now, ignore.

In our tape deck analogy, this action turns the tape deck on and arms it for recording. You can picture the tape deck with the record and pause button pushed, or in a playback loop awaiting the next track to be laid down.

Once you add a file, Git will identify it as a tracked file:

$ git add foo
$ git status
On branch master
Changes to be committed:
(use "git reset HEAD <file>..." to unstage)
new file:   foo

Adding a file to Git's tracking system is not making a recording. It just puts a file on the stage in preparation for recording. You can still change a file after you've added it; it's being tracked and remains staged, so you can continue to refine it or change it before committing it to tape (but be warned; you're NOT recording yet, so if you break something in a file that was perfect, there's no going back in time yet, because you never got that perfect moment on tape).

If you decide that the file isn't really ready to be recorded in the annals of Git history, then you can unstage something, just as the Git message described:

$ git reset HEAD foo

This, in effect, disarms the tape deck from being ready to record, and you're back to just noodling around in the studio.

The big commit

At some point, you're going to want to commit something; in our tape deck analogy, that means finally pressing record and laying a track down on tape.

At different stages of a project's life, how often you press that record button varies. For example, if you're hacking your way through a new Python toolkit and finally manage to get a window to appear, then you'll certainly want to commit so you have something to fall back on when you inevitably break it later as you try out new display options. But if you're working on a rough draft of some new graphics in Inkscape, you might wait until you have something you want to develop from before committing. Ultimately, though, it's up to you how often you commit; Git doesn't "cost" that much and hard drives these days are big, so in my view, the more the better.

A commit records all staged files in a repository. Git only records files that are tracked, that is, any file that you did a git add on at some point in the past. and that have been modified since the previous commit. If no previous commit exists, then all tracked files are included in the commit because they went from not existing to existing, which is a pretty major modification from Git's point-of-view.

To make a commit, run this command:

$ git commit -m 'My great project, first commit.'

This preserves all files committed for posterity (or, if you speak Gallifreyan, they become "fixed points in time"). You can see not only the commit event, but also the reference pointer back to that commit in your Git log:

$ git log --oneline
55df4c2 My great project, first commit.

For a more detailed report, just use git log without the --oneline option.

The reference number for the commit in this example is 55df4c2. It's called a commit hash and it represents all of the new material you just recorded, overlaid onto previous recordings. If you need to "rewind" back to that point in history, you can use that hash as a reference.

You can think of a commit hash as SMPTE timecode on an audio tape, or if we bend the analogy a little, one of those big gaps between songs on a vinyl record, or track numbers on a CD.

As you change files further and add them to the stage, and ultimately commit them, you accrue new commit hashes, each of which serve as pointers to different versions of your production.

And that's why they call Git a version control system, Charlie Brown.

In the next article, we'll explore everything you need to know about the Git HEAD, and we'll nonchalantly reveal the secret of time travel. No big deal, but you'll want to read it (or maybe you already have?).

Lead Image: 
Creating your first Git repository
Channel: 
Article Type: 
Default CC License: 

CC-BY-SA 4.0

up
2 readers like this

How to restore older file versions in Git

$
0
0

Read:

In today's article you will learn how to find out where you are in the history of your project, how to restore older file versions, and how to make Git branches so you can safely conduct wild experiments.

Where you are in the history of your Git project, much like your location in the span of a rock album, is determined by a marker called HEAD (like the playhead of a tape recorder or record player). To move HEAD around in your own Git timeline, use the git checkout command.

There are two ways to use the git checkout command. A common use is to restore a file from a previous commit, and you can also rewind your entire tape reel and go in an entirely different direction.

Restore a file

This happens when you realize you've utterly destroyed an otherwise good file. We all do it; we get a file to a great place, we add and commit it, and then we decide that what it really needs is one last adjustment, and the file ends up completely unrecognizable.

To restore it to its former glory, use git checkout from the last known commit, which is HEAD:

$ git checkout HEAD filename

If you accidentally committed a bad version of a file and need to yank a version from even further back in time, look in your Git log to see your previous commits, and then check it out from the appropriate commit:

$ git log --oneline
79a4e5f bad take
f449007 The second commit
55df4c2 My great project, first commit.

$ git checkout 55df4c2 filename

Now the older version of the file is restored into your current position. (You can see your current status at any time with the git status command.) You need to add the file because it has changed, and then commit it:

$ git add filename
$ git commit -m 'restoring filename from first commit.'

Look in your Git log to verify what you did:

$ git log --oneline
d512580 restoring filename from first commit
79a4e5f bad take
f449007 The second commit
55df4c2 My great project, first commit.

Essentially, you have rewound the tape and are taping over a bad take. So you need to re-record the good take.

Rewind the timeline

The other way to check out a file is to rewind the entire Git project. This introduces the idea of branches, which are, in a way, alternate takes of the same song.

When you go back in history, you rewind your Git HEAD to a previous version of your project. This example rewinds all the way back to your original commit:

$ git log --oneline
d512580 restoring filename from first commit
79a4e5f bad take
f449007 The second commit
55df4c2 My great project, first commit.

$ git checkout 55df4c2

When you rewind the tape in this way, if you hit the record button and go forward, you are destroying your future work. By default, Git assumes you do not want to do this, so it detaches HEAD from the project and lets you work as needed without accidentally recording over something you have recorded later.

If you look at your previous version and realise suddenly that you want to re-do everything, or at least try a different approach, then the safe way to do that is to create a new branch. You can think of this process as trying out a different version of the same song, or creating a remix. The original material exists, but you're branching off and doing your own version for fun.

To get your Git HEAD back down on blank tape, make a new branch:

$ git checkout -b remix
Switched to a new branch 'remix'

Now you've moved back in time, with an alternate and clean workspace in front of you, ready for whatever changes you want to make.

You can do the same thing without moving in time. Maybe you're perfectly happy with how your progress is going, but would like to switch to a temporary workspace just to try some crazy ideas out. That's a perfectly acceptable workflow, as well:

$ git status
On branch master
nothing to commit, working directory clean

$ git checkout -b crazy_idea
Switched to a new branch 'crazy_idea'

Now you have a clean workspace where you can sandbox some crazy new ideas. Once you're done, you can either keep your changes, or you can forget they ever existed and switch back to your master branch.

To forget your ideas in shame, change back to your master branch and pretend your new branch doesn't exist:

$ git checkout master

To keep your crazy ideas and pull them back into your master branch, change back to your master branch and merge your new branch:

$ git checkout master
$ git merge crazy_idea

Branches are powerful aspects of git, and it's common for developers to create a new branch immediately after cloning a repository; that way, all of their work is contained on their own branch, which they can submit for merging to the master branch. Git is pretty flexible, so there's no "right" or "wrong" way (even a master branch can be distinguished from what remote it belongs to), but branching makes it easy to separate tasks and contributions. Don't get too carried away, but between you and me, you can have as many Git branches as you please. They're free!

Working with remotes

So far you've maintained a Git repository in the comfort and privacy of your own home, but what about when you're working with other people?

There are several different ways to set Git up so that many people can work on a project at once, so for now we'll focus on working on a clone, whether you got that clone from someone's personal Git server or their GitHub page, or from a shared drive on the same network.

The only difference between working on your own private Git repository and working on something you want to share with others is that at some point, you need to push your changes to someone else's repository. We call the repository you are working in a local repository, and any other repository a remote.

When you clone a repository with read and write permissions from another source, your clone inherits the remote from whence it came as its origin. You can see a clone's remote:

$ git remote --verbose
origin  seth@example.com:~/myproject.Git (fetch)
origin  seth@example.com:~/myproject.Git (push)

Having a remote origin is handy because it is functionally an offsite backup, and it also allows someone else to be working on the project.

If your clone didn't inherit a remote origin, or if you choose to add one later, use the git remote command:

$ git remote add seth@example.com:~/myproject.Git

If you have changed files and want to send them to your remote origin, and have read and write permissions to the repository, use git push. The first time you push changes, you must also send your branch information. It is a good practice to not work on master, unless you've been told to do so:

$ git checkout -b seth-dev
$ git add exciting-new-file.txt
$ git commit -m 'first push to remote'
$ git push -u origin HEAD

This pushes your current location (HEAD, naturally) and the branch it exists on to the remote. After you've pushed your branch once, you can drop the -u option:

$ git add another-file.txt
$ git commit -m 'another push to remote'
$ git push origin HEAD

Merging branches

When you're working alone in a Git repository you can merge test branches into your master branch whenever you want. When working in tandem with a contributor, you'll probably want to review their changes before merging them into your master branch:

$ git checkout contributor
$ git pull
$ less blah.txt  # review the changed files
$ git checkout master
$ git merge contributor

If you are using GitHub or GitLab or something similar, the process is different. There, it is traditional to fork the project and treat it as though it is your own repository. You can work in the repository and send changes to your GitHub or GitLab account without getting permission from anyone, because it's your repository.

If you want the person you forked it from to receive your changes, you create a pull request, which uses the web service's backend to send patches to the real owner, and allows them to review and pull in your changes.

Forking a project is usually done on the web service, but the Git commands to manage your copy of the project are the same, even the push process. Then it's back to the web service to open a pull request, and the job is done.

In our next installment we'll look at some convenience add-ons to help you integrate Git comfortably into your everyday workflow.

Lead Image: 
How to restore older file versions in Git
Channel: 
Article Type: 
Default CC License: 

CC-BY-SA 4.0

up
7 readers like this

3 graphical tools for Git

$
0
0

Read:

In this article, we'll take a look at some convenience add-ons to help you integrate Git comfortably into your everyday workflow.

I learned Git before many of these fancy interfaces existed, and my workflow is frequently text-based anyway, so most of the inbuilt conveniences of Git suit me pretty well. It is always best, in my opinion, to understand how Git works natively. However, it is always nice to have options, so these are some of the ways you can start using Git outside of the terminal.

Git in KDE Dolphin

I am a KDE user, if not always within the Plasma desktop, then as my application layer in Fluxbox. Dolphin is an excellent file manager with lots of options and plenty of secret little features. Particularly useful are all the plugins people develop for it, one of which is a nearly-complete Git interface. Yes, you can manage your Git repositories natively from the comfort of your own desktop.

But first, you'll need to make sure the add-ons are installed. Some distros come with a filled-to-the-brim KDE, while others give you just the basics, so if you don't see the Git options in the next few steps, search your repository for something like dolphin-extras or dolphin-plugins.

To activate Git integration, go to the Settings menu in any Dolphin window and select Configure Dolphin.

In the Configure Dolphin window, click on the Services icon in the left column.

In the Services panel, scroll through the list of available plugins until you find Git.

Dolphin plugins.

Save your changes and close your Dolphin window. When you re-launch Dolphin, navigate to a Git repository and have a look around. Notice that all icons now have emblems: green boxes for committed files, solid green boxes for modified files, no icon for untracked files, and so on.

Your right-click menu now has contextual Git options when invoked inside a Git repository. You can initiate a checkout, push or pull when clicking inside a Dolphin window, and you can even do a git add or git remove on your files.

Git commands in Dolphin.

You can't clone a repository or change remote paths in Dolphin, but will have to drop to a terminal, which is just an F4 away.

Frankly, this feature of KDE is so kool [sic] that this article could just end here. The integration of Git in your native file manager makes working with Git almost transparent; everything you need to do just happens no matter what stage of the process you are in. Git in the terminal, and Git waiting for you when you switch to the GUI. It is perfection.

But wait, there's more!

Sparkleshare

From the other side of the desktop pond comes SparkleShare, a project that uses a file synchronization model ("like Dropbox!") that got started by some GNOME developers. It is not integrated into any specific part of GNOME, so you can use it on all platforms.

If you run Linux, install SparkleShare from your software repository. Other operating systems should download from the SparkleShare website. You can safely ignore the instructions on the SparkleShare website, which are for setting up a SparkleShare server, which is not what we will do here. You certainly can set up a SparkleShare server if you want, but SparkleShare is compatible with any Git repository, so you don't need to create your own server.

After it is installed, launch SparkleShare from your applications menu. Step through the setup wizard, which is two steps plus a brief tutorial, and optionally set SparkleShare as a startup item for your desktop.

Creating a SparkleShare account.

An orange SparkleShare directory is now in your system tray. Currently, SparkleShare is oblivious to anything on your computer, so you need to add a hosted project.

To add a directory for SparkleShare to track, click the SparkleShare icon in your system tray and select Add Hosted Project.

New SparkleShare project.

SparkleShare can work with self-hosted Git projects, or projects hosted on public Git services like GitHub and Bitbucket. For full access, you'll probably need to use the Client ID that SparkleShare provides to you. This is an SSH key acting as the authentication token for the service you use for hosting, including your own Git server, which should also use SSH public key authentication rather than password login. Copy the Client ID into the authorized_hosts  file of your Git user on your server, or into the SSH key panel of your Git host.

After configuring the host you want to use, SparkleShare downloads the Git project, including, at your option, the commit history. Find the files in ~/SparkleShare.

Unlike Dolphin's Git integration, SparkleShare is unnervingly invisible. When you make a change, it quietly syncs the change to your remote project. For many people, that is a huge benefit: all the power of Git with none of the maintenance. To me, it is unsettling, because I like to govern what I commit and which branch I use.

SparkleShare may not be for everyone, but it is a powerful and simple Git solution that shows how different open source projects fit together in perfect harmony to create something unique.

Git-cola

Yet another model of working with Git repositories is less native and more of a monitoring approach; rather than using an integrated application to interact directly with your Git project, you can use a desktop client to monitor changes in your project and deal with each change in whatever way you choose. An advantage to this approach is focus. You might not care about all 125 files in your project when only three of them are actively being worked on, so it is helpful to bring them to the forefront.

If you thought there were a lot of Git web hosts out there, you haven't seen anything yet. Git clients for your desktop are a dime-a-dozen. In fact, Git actually ships with an inbuilt graphical Git client. The most cross-platform and most configurable of them all is the open source Git-cola client, written in Python and Qt.

If you're on Linux, Git-cola may be in your software repository. Otherwise, just download it from the site and install it:

$ python setup.py install

When Git-cola launches, you're given three buttons to open an existing repository, create a new repo, or clone an existing repository.

Whichever you choose, at some point you end up with a Git repository. Git-cola, and indeed most desktop clients that I've used, don't try to be your interface into your repository; they leave that up to your normal operating system tools. In other words, I might start a repository with Git-cola, but then I would open that repository in Thunar or Emacs to start my work. Leaving Git-cola open as a monitor works quite well, because as you create new files, or change existing ones, they appear in Git-cola's Status panel.

The default layout of Git-cola is a little non-linear. I prefer to move from left-to-right, and because Git-cola happens to be very configurable, you're welcome to change your layout. I set mine up so that the left-most panel is Status, showing any changes made to my current branch, then to the right, a Diff panel in case I want to review a change, and the Actions panel for quick-access buttons to common tasks, and finally the right-most panel is a Commit panel where I can write commit messages.

Git-cola interface.

Even if you use a different layout, this is the general flow of Git-cola:

Changes appear in the Status panel. Right-click a change entry, or select a file and click the Stage button in the Action panel, to stage a file.

A staged file's icon changes to a green triangle to indicate that it has been both modified and staged. You can unstage a file by right-clicking and selecting Unstage Selected, or by clicking the Unstage button in the Actions panel.

Review your changes in the Diff panel.

When you are ready to commit, enter a commit message and click the Commit button.

There are other buttons in the Actions panel for other common tasks like a git pull or git push. The menus round out the task list, with dedicated actions for branching, reviewing diffs, rebasing, and a lot more.

I tend to think of Git-cola as a kind of floating panel for my file manager (and I only use Git-cola when Dolphin is not available). On one hand, it's less interactive than a fully integrated and Git-aware file manager, but on the other, it offers practically everything that raw Git does, so it's actually more powerful.

There are plenty of graphical Git clients. Some are paid software with no source code available, others are viewers only, others attempt to reinvent Git with special terms that are specific to the client ("sync" instead of "push"..?), and still others are platform-specific. Git-Cola has consistently been the easiest to use on any platform, and the one that stays closest to pure Git so that users learn Git whilst using it, and experts feel comfortable with the interface and terminology.

Git or graphical?

I don't generally use graphical tools to access Git; mostly I use the ones I've discussed when helping other people find a comfortable interface for themselves. At the end of the day, though, it comes down to what fits with how you work. I like terminal-based Git because it integrates well with Emacs, but on a day where I'm working mostly in Inkscape, I might naturally fall back to using Git in Dolphin because I'm in Dolphin anyway.

It's up to you how you use Git; the most important thing to remember is that Git is meant to make your life easier and those crazy ideas you have for your work safer to try out. Get familiar with the way Git works, and then use Git from whatever angle you find works best for you.

In our next installment, we will learn how to set up and manage a Git server, including user access and management, and running custom scripts.

Lead Image: 
3 graphical tools for Git
Channel: 
Article Type: 
Default CC License: 

CC-BY-SA 4.0

up
2 readers like this

How to build your own Git server

$
0
0

Read:

Now we will learn how to build a Git server, and how to write custom Git hooks to trigger specific actions on certain events (such as notifications), and publishing your code to a website.

Up until now, the focus has been interacting with Git as a user. In this article I'll discuss the administration of Git, and the design of a flexible Git infrastructure. You might think it sounds like a euphemism for "advanced Git techniques" or "only read this if you're a super-nerd", but actually none of these tasks require advanced knowledge or any special training beyond an intermediate understanding of how Git works, and in some cases a little bit of knowledge about Linux.

Shared Git server

Creating your own shared Git server is surprisingly simple, and in many cases well worth the trouble. Not only does it ensure that you always have access to your code, it also opens doors to stretching the reach of Git with extensions such as personal Git hooks, unlimited data storage, and continuous integration and deployment.

If you know how to use Git and SSH, then you already know how to create a Git server. The way Git is designed, the moment you create or clone a repository, you have already set up half the server. Then enable SSH access to the repository, and anyone with access can use your repo as the basis for a new clone.

However, that's a little ad hoc. With some planning a you can construct a well-designed Git server with about the same amount of effort, but with better scalability.

First things first: identify your users, both current and in the future. If you're the only user then no changes are necessary, but if you intend to invite contributors aboard, then you should allow for a dedicated shared system user for your developers.

Assuming that you have a server available (if not, that's not exactly a problem Git can help with, but CentOS on a Raspberry Pi 3 is a good start), then the first step is to enable SSH logins using only SSH key authorization. This is much stronger than password logins because it is immune to brute-force attacks, and disabling a user is as simple as deleting their key.

Once you have SSH key authorization enabled, create the gituser. This is a shared user for all of your authorized users:

$ su -c 'adduser gituser'

Then switch over to that user, and create an ~/.ssh framework with the appropriate permissions. This is important, because for your own protection SSH will default to failure if you set the permissions too liberally.

$ su - gituser
$ mkdir .ssh && chmod 700 .ssh
$ touch .ssh/authorized_keys
$ chmod 600 .ssh/authorized_keys

The authorized_keys file holds the SSH public keys of all developers you give permission to work on your Git project. Your developers must create their own SSH key pairs and send you their public keys. Copy the public keys into the gituser's authorized_keys file. For instance, for a developer called Bob, run these commands:

$ cat ~/path/to/id_rsa.bob.pub >> \
/home/gituser/.ssh/authorized_keys

As long as developer Bob has the private key that matches the public key he sent you, Bob can access the server as gituser.

However, you don't really want to give your developers access to your server, even if only as gituser. You only want to give them access to the Git repository. For this very reason, Git provides a limited shell called, appropriately, git-shell. Run these commands as root to add git-shell to your system, and then make it the default shell for your gituser:

# grep git-shell /etc/shells || su -c \"echo `which git-shell` >> /etc/shells"
# su -c 'usermod -s git-shell gituser'

Now the gituser can only use SSH to push and pull Git repositories, and cannot access a login shell. You should add yourself to the corresponding group for the gituser, which in our example server is also gituser.

For example:

# usermod -a -G gituser seth

The only step remaining is to make a Git repository. Since no one is going to interact with it directly on the server (that is, you're not going to SSH to the server and work directly in this repository), make it a bare repository. If you want to use the repo on the server to get work done, you'll clone it from where it lives and work on it in your home directory.

Strictly speaking, you don't have to make this a bare repository; it would work as a normal repo. However, a bare repository has no *working tree* (that is, no branch is ever in a `checkout` state). This is important because remote users are not permitted to push to an active branch (how would you like it if you were working in a `dev` branch and suddenly someone pushed changes into your workspace?). Since a bare repo can have no active branch, that won't ever be an issue.

You can place this repository anywhere you please, just as long as the users and groups you want to grant permission to access it can do so. You do NOT want to store the directory in a user's home directory, for instance, because the permissions there are pretty strict, but in a common shared location, such as /opt or /usr/local/share.

Create a bare repository as root:

# git init --bare /opt/jupiter.git
# chown -R gituser:gituser /opt/jupiter.git
# chmod -R 770 /opt/jupiter.git

Now any user who is either authenticated as gituser or is in the gituser group can read from and write to the jupiter.git repository. Try it out on a local machine:

$ git clone gituser@example.com:/opt/jupiter.git jupiter.clone
Cloning into 'jupiter.clone'...
Warning: you appear to have cloned an empty repository.

Remember: developers MUST have their public SSH key entered into the authorized_keys file of gituser, or if they have accounts on the server (as you would), then they must be members of the gituser group.

Git hooks

One of the nice things about running your own Git server is that it makes Git hooks available. Git hosting services sometimes provide a hook-like interface, but they don't give you true Git hooks with access to the file system. A Git hook is a script that gets executed at some point during a Git process; a hook can be executed when a repository is about to receive a commit, or after it has accepted a commit, or before it receives a push, or after a push, and so on.

It is a simple system: any executable script placed in the .git/hooks directory, using a standard naming scheme, is executed at the designated time. When a script should be executed is determined by the name; a pre-push script is executed before a push, a post-receive script is executed after a commit has been received, and so on. It's more or less self-documenting.

Scripts can be written in any language; if you can execute a language's hello world script on your system, then you can use that language to script a Git hook. By default, Git ships with some samples but does not have any enabled.

Want to see one in action? It's easy to get started. First, create a Git repository if you don't already have one:

$ mkdir jupiter
$ cd jupiter
$ git init .

Then write a "hello world" Git hook. Since I use tcsh at work for legacy support, I'll stick with that as my scripting language, but feel free to use your preferred language (Bash, Python, Ruby, Perl, Rust, Swift, Go) instead:

$ echo "#\!/bin/tcsh"> .git/hooks/post-commit
$ echo "echo 'POST-COMMIT SCRIPT TRIGGERED'"> \
~/jupiter/.git/hooks/post-commit
$ chmod +x ~/jupiter/.git/hooks/post-commit

Now test it out:

$ echo "hello world"> foo.txt
$ git add foo.txt
$ git commit -m 'first commit'
! POST-COMMIT SCRIPT TRIGGERED
[master (root-commit) c8678e0] first commit
1 file changed, 1 insertion(+)
create mode 100644 foo.txt

And there you have it: your first functioning Git hook.

The famous push-to-web hook

A popular use of Git hooks is to automatically push changes to a live, in-production web server directory. It is a great way to ditch FTP, retain full version control of what is in production, and integrate and automate publication of content.

If done correctly, it works brilliantly and is, in a way, exactly how web publishing should have been done all along. It is that good. I don't know who came up with the idea initially, but the first I heard of it was from my Emacs- and Git- mentor, Bill von Hagen at IBM. His article remains the definitive introduction to the process: Git changes the game of distributed Web development.

Git variables

Each Git hook gets a different set of variables relevant to the Git action that triggered it. You may or may not need to use those variables; it depends on what you're writing. If all you want is a generic email alerting you that someone pushed something, then you don't need specifics, and probably don't even need to write the script as the existing samples may work for you. If you want to see the commit message and author of a commit in that email, then your script becomes more demanding.

Git hooks aren't run by the user directly, so figuring out how to gather important information can be confusing. In fact, a Git hook script is just like any other script, accepting arguments from stdin in the same way that BASH, Python, C++, and anything else does. The difference is, we aren't providing that input ourselves, so to use it you need to know what to expect.

Before writing a Git hook, look at the samples that Git provides in your project's .git/hooks directory. The pre-push.sample file, for instance, states in the comments section:

# $1 -- Name of the remote to which the push is being done
# $2 -- URL to which the push is being done
# If pushing without using a named remote those arguments will be equal.
#
# Information about commit is supplied as lines
# to the standard input in this form:
# <local ref> <local sha1> <remote ref> <remote sha1>

Not all samples are that clear, and documentation on what hook gets what variable is still a little sparse (unless you want to read the source code of Git), but if in doubt, you can learn a lot from the trials of other users online, or just write a basic script and echo $1, $2, $3, and so on.

Branch detection example

I have found that a common requirement in production instances is a hook that triggers specific events based on what branch is being affected. Here is an example of how to tackle such a task.

First of all, Git hooks are not, themselves, version controlled. That is, Git doesn't track its own hooks because a Git hook is part of Git, not a part of your repository. For that reason, a Git hook that oversees commits and pushes probably make most sense living in a bare repository on your Git server, rather than as a part of your local repositories.

Let's write a hook that runs upon post-receive (that is, after a commit has been received). The first step is to identify the branch name:

#!/bin/tcsh

foreach arg ( $< )
  set argv = ( $arg )
  set refname = $1
end

This for-loop reads in the first arg ($1) and then loops again to overwrite that with the value of the second ($2), and then again with the third ($3). There is a better way to do that in Bash: use the read command and put the values into an array. However, this being tcsh and the variable order being predictable, it's safe to hack through it.

When we have the refname of what is being commited, we can use Git to discover the human-readable name of the branch:

set branch = `git rev-parse --symbolic --abbrev-ref $refname`
echo $branch #DEBUG

And then compare the branch name to the keywords we want to base the action on:

if ( "$branch" == "master" ) then
  echo "Branch detected: master"
  git \
    --work-tree=/path/to/where/you/want/to/copy/stuff/to \
    checkout -f $branch || echo "master fail"
else if ( "$branch" == "dev" ) then
  echo "Branch detected: dev"
  Git \
    --work-tree=/path/to/where/you/want/to/copy/stuff/to \
    checkout -f $branch || echo "dev fail"
  else
    echo "Your push was successful."
    echo "Private branch detected. No action triggered."
endif

Make the script executable:

$ chmod +x ~/jupiter/.git/hooks/post-receive

Now when a user commits to the server's master branch, the code is copied to an in-production directory, a commit to the dev branch get copied someplace else, and any other branch triggers no action.

It's just as simple to create a pre-commit script that, for instance, checks to see if someone is trying to push to a branch that they should not be pushing to, or to parse commit messages for approval strings, and so on.

Git hooks can get complex, and they can be confusing due to the level of abstraction that working through Git imposes, but they're a powerful system that allows you to design all manner of actions in your Git infrastructure. They're worth dabbling in, if only to become familiar with the process, and worth mastering if you're a serious Git user or full-time Git admin.

In our next and final article in this series, we will learn how to use Git to manage non-text binary blobs, such as audio and graphics files.

Lead Image: 
How to build your own Git server
Channel: 
Article Type: 
Default CC License: 

CC-BY-SA 4.0

up
4 readers like this

Automating pre-press layouts with Linux commands

$
0
0

Armed with a few simple open source commands, you can drastically reduce the effort involved in prepping your work for print.

Going to print is an exciting time for any designer. Your hard work finally gets rendered into an attractive-looking PDF, you send it away to the great big print shop, and eventually you go to the magazine store or bookshop and find the results of your hard work on display for all to see.

Reading between the lines of that process, though, there are quite a few processes that have to happen to move a design from the desktop to the printed page. The most obvious is the content and design itself, and after that the layout, and finally the management of the pages and generation of signatures. It's the last part that I'll cover in this article, and then I'll work backwards next month to discuss layout with Scribus.

There are several Linux tools that I use when prepping something for press, and they're all run from the Unix shell. This may seem frightening, especially if you're a visual person as many designers are, but when you're faced with a 300-page book and you have to generate a printer spread, the last thing you want is a point-and-click page manager that forces you to place every page manually. This is exactly where a shell command excels: repetitive, mindless, boring work that you'd like to have done for you at the press of a button.

Printer spreads

How many sides are there to a sheet of paper?

If you said "two", you're (surprisingly) wrong! At least in professional printing, pages can have four sides, or more. Not physically, of course, but when you print, you often print two "pages" per side of a sheet of paper, making four "pages" per one sheet of paper.

A sheet of paper that contains smaller "pages" on each side of it, intended for printing, is called a signature.

Linux Commands for Pre Press

I'm a fan of do-it-yourself, so it's worth mentioning that even if you're not going to press in the formal sense of going to a printshop to pay for professional print jobs, there is great power in understanding signatures. Simply by designing a booklet or brochure in the right spread, you can create easy 8- or 16- page foldable zines that you can print and "bind" (actually, just cut and fold) at home.

What all of this means is that you get to design your work in a "reader spread" layout, which is the order and layout in which the reader will actually view your work, and then output to PDF to get your design into the PostScript language that printers (the hardware, not the people) communicate in, and then convert to a printer spread for the actual physical act of printing.

PDFJam and Pdfbook

Some printshops are happy to convert your reader spread to a printer spread themselves, so you should communicate with your printer as early as possible to find out their requirements and preferences. I have had bad experiences with some printers, though, because frequently their workflow involves opening a PDF reader spread in some Adobe product in order to re-order the pages to a printer spread. That seems like a sensible (albeit non-open source) solution, except that sometimes the Adobe product munges vector paths or tries to convert or re-size a font (or maybe gets confused about the font to use? I'm not sure what the issue is, actually, but I know the result, and it ain't pretty), and the design comes out different than what was sent in. Which, incidentally, defeats the purpose of the PDF format. For that reason, I prefer to send my own printer spread when possible; this cuts out the middleman and essentially uses the printshop as a print server and paper stock vendor.

There are several ways to convert a PDF to a printer spread, but the easiest tool is PDFJam, a collection of shell scripts that do all the hard maths and repetitive page jockeying for you.

Manipulating PDFs is usually dependent upon either Java or LaTeX; PDFJam relies on the latter, so a healthy texlive install is vital. And when I say "healthy", I mean do a search for texlive in your Linux distribution's software repository, and install everything you find. At a minimum, you should install texlive and texlive-extra-utils, which should contain pdflatex.

PDFJam is the master script, but it comes bundled with a few smaller wrapper scripts to simplify common tasks.

A simple example:

$ pdfbook --landscape slackermedia_14.2.pdf 

This produces a 2-up (four page signature), duplex-printable (along the long side of the sheet) printer spread as a file called, in this example, slackermdia_14.2-book.pdf. Print that file, and you have paper that can be bound into a volume that, when viewed, is in the appropriate order for reading, just as you designed it.

The pdfbook command is just a simplified parser for a more complex pdfjam. This is an example of Pdfbook's functionality as a pure pdfjam command:

$ pdfjam --booklet 'true' --landscape \
--signature '4' --landscape slackermedia.pdf \
-o slackermedia.pdf

All of the helper scripts resolve to a more complex pdfjam command, and each tells you exactly what you've run after it completes the task. Use whatever you are most comfortable with.

pdfnup

Sometimes you're not printing a book, or you're printing a book but you need more than just a 2-up. Maybe you need n-up. If you do, you can use the pdfnup command.

I was recently printing a RPG-like card game at home, so I needed a 9-up spread. Fancy looping aside (this isn't a Bash tutorial, so I'm simplifying), the command boils down to:

$ pdfnup --nup 3x3 --suffix '3x3' \
`\ls -1 *.png | head -n9` \&& mv -i `ls -1 *.png | head -n9` prepped/

The result was a matrix of cards, ready for slicing.

frontback

Cardtable

PDFtk

Aside from PDFjam, the other major PDF manipulation application useful for pre-press is PDFtk. This handy command specializes in separating and concatenating PDF documents.

My two primary uses for PDFtk are appending front and back matter to a PDF, and any time it's more convenient to print several PDFs as one document.

Concatenating several PDF files is simple; it's one of the examples provided in the man page, so it's a pretty common use:

$ pdftk ch1.pdf ch2.pdf cat output book.pdf

For several PDFs, use a wildcard:

$ pdftk *.pdf cat output book.pdf 

ImageMagick

ImageMagick is truly a "Swiss army knife" application. Like pdfjam, it consists of several smaller task-spetific commands, almost all of which are useful to a designer. It really deserves an article on its own, although its own extensive and excellent documentation covers that pretty well.

I use ImageMagick to quickly convert image formats as needed. It's easily scriptable, being a Unix command, so it's one of those things you can incorporate into a Makefile or build script. For example, if all of my source images for a textbook are in SVG format and I need them to be rasterized for whatever reason, then:

$ for FILE in *svg ; do \
convert $FILE -density 300 $FILE.png; \
done 

It can also, conveniently, convert to PDF, in the event that your printer accepts only PDF:

$ convert image.tiff image.pdf 

The tool does a lot more than just conversion; as the documentation reveals, you can resize and manipulate images nearly as much as you can with a GUI tool like GIMP. As I mentioned in my Semi Useless Toys article, there are even pre-made scripts from users that'll make some of the heavy lifting surprisingly simple.

Take Linux to the press

Armed with these simple commands, you can drastically reduce the time it takes to get both print and web versions of your work in order. And even more importantly, you maintain control over the quality of your product; what you send to a printer will be exactly what you get back, and the entire workflow can be scripted so that you only have to figure it out once.

It all makes for a powerful and customize-able system. Design yours today!

Lead Image: 
Automating pre-press layouts with Linux commands
Channel: 
Article Type: 
Default CC License: 

CC-BY-SA 4.0

Column: 
Multimedia Makers
up
7 readers like this

How to manage binary blobs with Git

$
0
0

Read:

In the previous six articles in this series we learned how to manage version control on text files with Git. But what about binary files? Git has extensions for handling binary blobs such as multimedia files, so today we will learn how to manage binary assets with Git.

One thing everyone seems to agree on is Git is not great for big binary blobs. Keep in mind that a binary blob is different from a large text file; you can use Git on large text files without a problem, but Git can't do much with an impervious binary file except treat it as one big solid black box and commit it as-is.

Say you have a complex 3D model for the exciting new first person puzzle game you're making, and you save it in a binary format, resulting in a 1 gigabyte file. You git commit it once, adding a gigabyte to your repository's history. Later, you give the model a different hair style and commit your update; Git can't tell the hair apart from the head or the rest of the model, so you've just committed another gigabyte. Then you change the model's eye color and commit that small change: another gigabyte. That is three gigabytes for one model with a few minor changes made on a whim. Scale that across all the assets in a game, and you have a serious problem.

Contrast that to a text file like the .obj format. One commit stores everything, just as with the other model, but an .obj file is a series of lines of plain text describing the vertices of a model. If you modify the model and save it back out to .obj, Git can read the two files line by line, create a diff of the changes, and process a fairly small commit. The more refined the model becomes, the smaller the commits get, and it's a standard Git use case. It is a big file, but it uses a kind of overlay or sparse storage method to build a complete picture of the current state of your data.

However, not everything works in plain text, and these days everyone wants to work with Git. A solution was required, and several have surfaced.

OSTree began as a GNOME project and is intended to manage operating system binaries. It doesn't apply here, so I'll skip it.

Git Large File Storage (LFS) is an open source project from GitHub that began life as a fork of git-media. git-media and git-annex are extensions to Git meant to manage large files. They are two different approaches to the same problem, and they each have advantages. These aren't official statements from the projects themselves, but in my experience, the unique aspects of each are:

  • git-media is a centralised model, a repository for common assets. You tell git-media where your large files are stored, whether that is a hard drive, a server, or a cloud storage service, and each user on your project treats that location as the central master location for large assets.
  • git-annex favors a distributed model; you and your users create repositories, and each repository gets a local .git/annex directory where big files are stored. The annexes are synchronized regularly so that all assets are available to all users as needed. Unless configured otherwise with annex-cost, git-annex prefers local storage before off-site storage.

Of these options, I've used git-media and git-annex in production, so I'll give you an overview of how they each work.

git-media

git-media uses Ruby, so you must install a gem for it. Instructions are on the website. Each user who wants to use git-media needs to install it, but it is cross-platform, so that is not a problem.

After installing git-media, you must set some Git configuration options. You only need to do this once per machine you use:

$ git config filter.media.clean "git-media filter-clean"
$ git config filter.media.smudge "git-media filter-smudge"

In each repository that you want to use git-media, set an attribute to marry the filters you've just created to the file types you want to classify as media. Don't get confused by the terminology; a better term is "assets," since "media" usually means audio, video, and photos, but you might just as easily classify 3D models, bakes, and textures as media.

For example:

$ echo "*.mp4 filter=media -crlf">> .gitattributes
$ echo "*.mkv filter=media -crlf">> .gitattributes
$ echo "*.wav filter=media -crlf">> .gitattributes
$ echo "*.flac filter=media -crlf">> .gitattributes
$ echo "*.kra filter=media -crlf">> .gitattributes

When you stage a file of those types, the file is copied to .git/media.

Assuming you have a Git repository on the server already, the final step is to tell your Git repository where the "mothership" is; that is, where the media files will go when they have been pushed for all users to share. Set this in the repository's .git/config file, substituting your own user, host, and path:

[git-media]
transport = scp
autodownload = false #true to pull assets by default
scpuser = seth
scphost = example.com
scppath = /opt/jupiter.git

If you have complex SSH settings on your server, such as a non-standard port or path to a non-default SSH key file use .ssh/config to set defaults for the host.

Life with git-media is mostly normal; you work in your repository, you stage files and blobs alike, and commit them as usual. The only difference in workflow is that at some point along the way, you should sync your secret stockpile of assets (er, media) to the shared repository.

When you are ready to publish your assets for your team or for your own backup, use this command:

$ git media sync

To replace a file in git-media with a changed version (for example, an audio file has been sweetened, or a matte painting has been completed, or a video file has been colour graded), you must explicitly tell Git to update the media. This overrides git-media's default to not copy a file if it already exists remotely:

$ git update-index --really-refresh

When other members of your team (or you, on a different computer) clones the repository, no assets will be downloaded by default unless you have set the autodownload option in .git/config to true. A git media sync cures all ills.

git-annex

git-annex has a slightly different workflow, and defaults to local repositories, but the basic ideas are the same. You should be able to install git-annex from your distribution's repository, or you can get it from the website as needed. As with git-media, any user using git-annex must install it on their machine.

The initial setup is simpler than git-media. To create a bare repository on your server run this command, substituting your own path:

$ git init --bare --shared /opt/jupiter.git

Then clone it onto your local computer, and mark it as a git-annex location:

$ git clone seth@example.com:/opt/jupiter.clone
Cloning into 'jupiter.clone'... warning: You appear to have cloned
an empty repository. Checking connectivity... done.
$ git annex init "seth workstation" init seth workstation ok

Rather than using filters to identify media assets or large files, you configure what gets classified as a large file by using the git annex command:

$ git annex add bigblobfile.flac
add bigblobfile.flac (checksum) ok
(Recording state in Git...)

Committing is done as usual:

$ git commit -m 'added flac source for sound fx'

But pushing is different, because git annex uses its own branch to track assets. The first push you make may need the -u option, depending on how you manage your repository:

$ git push -u origin master git-annex
To seth@example.com:/opt/jupiter.git
* [new branch] master -> master
* [new branch] git-annex -> git-annex

As with git-media, a normal git push does not copy your assets to the server, it only sends information about the media. When you're ready to share your assets with the rest of the team, run the sync command:

$ git annex sync --content

If someone else has shared assets to the server and you need to pull them, git annex sync will prompt your local checkout to pull assets that are not present on your machine, but that exist on the server.

Both git-media and git-annex are flexible and can use local repositories instead of a server, so they're just as useful for managing private local projects, too.

Git is a powerful and extensible system, and by now there is really no excuse for not using it. Try it out today!

Lead Image: 
How to manage binary blobs with Git
Channel: 
Article Type: 
Default CC License: 

CC-BY-SA 4.0

up
2 readers like this

What do we mean when we talk about software 'alternatives'?

$
0
0

The word alternative is one of those shifty terms, with a definition that changes depending on perspective. For instance, something that is alternative to one person is the norm for another. Generally, the term alternative is considered to be defined by the fact that it is not considered to be in the majority or the mainstream.

Then again, sometimes the term "alternative" gets attached to the second instance of something. If a web server, such as Apache, exists, then any time a different web server gets mentioned, it gets the alternative badge, because we all assume that we all silently concede that whatever it is, it's an alternative to that big one that we all know about.

Problems of persistence

These thoughts occurred to me the other night while I was tracking down a bug in some simple animation software I wrote. In this software, a user clicks a frame in the timeline and that frame gets an overlay icon or badge to mark it as the current selection. If a user clicks the frame again, we assume that the user is toggling the selection off, so the badge gets removed. Pretty obvious, typical user interface (UI).

screenshotClick on, click off.

The problem was that if a user tried to select the same frame again to re-select it, the frame would refuse to be selected because it already believed itself to be the active selection. The problem was solved pretty easily by some rudimentary garbage collection (although the larger problem is that the application needs a more robust selection library, but I digress), but it dawned on me that this issue was similar to what we, as a community of computer users, experience when we speak about applications.

Whether an application is the first on the scene, or one that is best marketed, or one that gets adopted by a majority of influential companies, we computerists often award a badge to one application early on, when it's fresh. There's an implication that that software earned that badge by merit. And as that software grows and develops, it gets to keep that badge.

The badge we give it is the right to be The One to which anything else is an alternative. We do it with open source projects and closed source projects alike. We assign this invisible and silent Seal of Authenticity without any RFC, without debate or survey. Sometimes the badge is, if only by default, accurate; if there really is no other application like it, then it's hard to argue against referring to a software that comes later as an alternative.

The problem is, there doesn't seem to be a requisite renewal period for these badges that we unwittingly hand out on a first-come-first-served basis. We give our Seal of Authenticity to whatever makes the biggest (or only) splash at some point, and it becomes not just the standard in its class, but it becomes the specification for everything following. You can't make a word processor at this point without it being compared to Microsoft Word. To propose that Word is an insufficient measure of efficient word processing power seems verboten, but for better or for worse, Word got the badge and there's been no garbage collection to clear out memory addresses in order to allow for a second badge, or a new badge altogether.

There have been exceptions to this, of course—sometimes big popular applications finally fall out of favor, but more often than not, the computing public has an unnervingly long-term memory for its definitions list. You can rattle off general application types, and most people, Rorschach-style, have a brand name associated with it:

  • Office: Microsoft
  • Photo: Adobe
  • Video: Apple
  • Server: Linux

Is it really so clear, so obvious? Or are we just being trite?

Problems of scope

In programming and other industries there is a concept of scope, which defines the space in which something is true. In one function of an application, I might assign one value to a variable, but I only need that value within one function, so I make the variable local—it's valid for this function, but another function knows nothing about it.

As it turns out, this is yet another great analogy for how we computer users define alternative software. Different people need different things from their computers, to the point that it may never even occur to someone that particular software not only exists, but is the very linchpin of an entire industry. As an employee of the visual effects industry, my definition of obvious de facto applications certainly differs greatly from someone who manages, say, construction material durability requirements, or even from someone who teaches the basics of video production to children.

The general computing public rarely acknowledges this, I suspect because of marketing, mostly. It's not in the interest, however disingenuous, for software ads to acknowledge that there are competitors or alternatives. Every software trying to sell itself is obligated to pretend that it's the only real solution available—nothing else compares, but if you do find something else, then you must compare it to this software, because this one's the real one (it's the one that got the seal, the badge).

And, strangely, outside of your own computing scope, your standard application becomes niche. You can sit down with your friends at the café and tell them how great this software is, but if it didn't get the badge within their scope of computing, then you may as well be speaking Greek without UTF-8.

Reclaiming the term "alternative"

The requirements for getting the badge that makes all other software an alternative are pretty fuzzy. We're not really sure if it's first-come-first-serve, or whether it's market-share or brain-share, or how we measure brain-share. While those measurements do feel like obvious choices, that availability rarely enters the equation seems odd.

Certainly in my own life, the natural barrier to entry to most everything I do, both professionally and as a hobby, has been a trial of acquisition. I only managed to get into audio production because Audacity existed and was $0 to use (I've since graduated to Qtractor but Audacity was the gateway). It was available, regardless of my financial state (which, as a college student, was not good at the time). FFmpeg single-handedly got me paid employment in the media industry, and I was able to learn and use it because it was available and cost nothing to use. The list goes on.

I realized some time ago that I live in an open source world. We all do, because open source drives so much of computing these days, but I mean that the way I compute is with open source at both the bottom and top of my stack—I use open source in my networking, I use an open source kernel to drive physical hardware, and I use open source applications at work and at home. To a degree, I live in a bubble, but it's a bubble that I consciously built and it serves me well. So the question is: If the alternative is my everyday computing experience, why should I still define it as alternative? Surely my way of life is not alternative from my perspective.

OK, so alternative is a malleable term. But it's bigger than that. It's not just a question of life with The Munsters, it's a question of who's allowed in. With open source, there's no exclusion; even in the worst case where you feel unwelcome by some community that is building an open source application, you still have access to the code. Then the barrier to entry is your own resolve to learn a new application.

And that ought to be the standard, no matter what. My Rorschachian responses to application types default to open source, with the alternatives being the ones that you might choose to use if, for whatever reason, you find the ones available to everyone insufficient:

The list goes on and on. You define your own alternatives, but my mainstream day-to-day tools are not alternatives. They're the ones that gets my seal of authenticity, and they're open to everyone.

Lead Image: 
What do we mean when we talk about software 'alternatives'?
Channel: 
Article Type: 
Default CC License: 

CC-BY-SA 4.0

up
4 readers like this

Which eBook format do you prefer?

$
0
0
Channel: 
Body: 

Which eBook format do you prefer?

up
Be the first to like this

10 reasons to use Flowblade on Linux as your video editor

$
0
0

The software racket is like anything else: there are loud projects that get a lot of attention but don't actually get much done, there are heavyweights that move in and make sure things get done, and there are the quiet ones that work with their head down, diligently, only to turn up at the finish line with a work of art. In this analogy, Kdenlive is my personal heavyweight, but Flowblade has lingered in the background, developing and improving into a surprisingly effective and efficient video editor for Linux.

So why use Flowblade over other options? I have several good reasons; here are ten of them.

Flowblade graphical interface.

1. Lightweight

Flowblade is a surprisingly lightweight application, which isn't a common trait among video editing applications. Of course, saying this about a Linux application can be deceptive, because Flowblade itself is essentially a front-end for MLT and FFmpeg, but complexity under the hood and file sizes aside, Flowblade is designed for cutting video. It doesn't have twenty extra features that only apply to video peripherally.

The features it does have are a laundry list of all the common must-have requests from working editors; there are all the usual video cutting tasks, a full set of visual effects, some basic audio effects with keyframing, and exporting. That's it. Just everything you need, without any of the extra bells and whistles to get in your way.

Keyframing on the timeline.

2. Simplicity

Video editors are famously complex, so how can an application that can fit all of its functionality in a single row of buttons claim to be a serious editor? Quite effectively, as it turns out; all of Flowblade's primary functionality does indeed fit in about ten buttons in the middle button bar of the interface. Additional buttons are present for some detail work (zooming in and out, undo and redo) but most of the application fits in one horizontal toolbar.

Better yet, all the major functions are assigned to keyboard shortcuts, so once you get into the swing of things, the editing process becomes fluid, and even graceful. Even if you've never used Flowblade before, you'll fly through hours of footage and end up with a rough assembly in next to no time, making it easily one of the simplest editors I've used.

Color adjustment.

3. Video effects

Flowblade benefits from the same set of video effects that nearly every Linux video editor has: the Frei0r. What that means is that you inherit a bunch of great video effects that are already written and ready to use, plus you get the great front-end user interface (UI) that Flowblade's developer provides you.

When I first wrote about Flowblade in the Linux Format magazine a few years ago, its effects UI was backwards. Literally. The UI of the colour correction, for instance, worked in reverse. But that's been overhauled now and the UI is one of the best front-ends for Frei0r effects that I've seen. The effects are intuitive, stack-able, and they look great.

But wait, that's not all.

Lately, Flowblade has even integrated the G'MIC filters, made popular by GIMP but so rich in features that it's really an application in itself.

In other words, you have plenty to choose from.

Video effects.

4. Audio effects

I'm a traditionalist. I don't bother mixing my audio in my video editor. But many people do, either because they have to or because they haven't been trained on an audio mixing application, so it's not uncommon for an editor to ask that their application have at least basic audio mixing close at hand.

Flowblade provides. It's got the obvious volume mixer, plus a few extras, like panning and even swapping channels. Even better, it's got the easiest and most comfortable keyframing system I've seen in a Linux editor so far. I imagine even if you've never keyframed anything before in your life, you could probably figure this one out; add a keyframe, set your volume, add another keyframe, set your new volume. It's simple, it's intuitive, and it's effective. You hear the changes immediately, it plays back smoothly, it's exactly what a smash-and-grab video editor wants.

Audio effects.

5. Smooth playback

Flowblade has consistently amazed me at the smoothness of its playback. Admittedly, MLT has improved and my computer has gotten a better graphics card, but Flowblade has crunched through my video in ways it just doesn't seem a lightweight editor has any business doing. It's by no means magick, and I wouldn't bet the farm on smooth playback under all conditions, but from the viewpoint of living in a video editor for days at a time, I can say comfortably that Flowblade performs well under the typical "Let's throw this effect on the footage for now, and see what happens" workload. Sure, if I pile on too many effects then I have to create a temporary render of a clip to properly audition the effect, but for quick reference, it does great.

Eventually, any working editor has to decide how they want their application to deal with realtime effects. So far Linux editing apps mostly leave it to the user, which is good because that means that you can use Flowblade on a five-year-old laptop, or on the latest and greatest custom-built desktop. The payoff to that flexibility is that you get to manage your own previews. But if you're too much in the flow of editing to be bothered, you can at least rest assured that Flowblade will do its best to keep up with all your crazy ideas.

Smooth playback.

6. Drag and drop

The film school I attended forced its first year students to work in Super 8 film. We had to shoot, develop, and hand-cut celluloid, using wax pencils to mark our in and out points and cello tape to join our splices. A side effect of this training was that most of us learnt to be pretty adaptable in what tools we could use to cut footage together. It's akin to learning to drive a stick shift.

Cutting to the chase (so to speak), Flowblade is both a traditional film-style editor as well as a friendly drag-and-drop video scratchpad. By that, I mean if you're an editor who thinks in Timecode (or SMPTE) and A-and-B (a style of conceptualizing editing), and sees video as just a visual reference to your EDL (edit decision list), then Flowblade accommodates. But if you're more a visual person who likes to get down in the timeline and click and drag clips around, Flowblade lets you do that, too.

Flowblade uses the float: left rule that's become popular in editing applications lately, so when you add a clip it defaults to snapping to the clip to its left. But by using the Overwrite cursor, you can un-float a clip and move it anywhere in the timeline you please. Gray matter filler is placed between your clip and whatever is to its left in order to mimic a sort of celluloid base layer.

Rendering options.

7. Render options

Since Flowblade uses FFmpeg and MLT as its foundation technologies, there are plenty of options when it comes to delivering your work. You can use the inbuilt render UI, which makes the process pretty innocuous; it defaults to match most of your project settings, so at worst you'll end up with something that's appropriate. If you prefer to override some settings, there's a panel right in the UI for that.

Better still, you can forego the inbuilt UI and render from the command line using the MLT back-end, so if you need to farm rendering out, you have the freedom to do that.

Edit decision lists.

8. Durability

What does "durability" mean in the context of a video editing application? It might be easier to explain what's not"durable" in a video editor. For years, video editing applications have been islands to themselves. There have been some stabs at interchange formats, and there are generic edit decision lists, but mostly if you use one editing application, you are stuck with it. Which means you're completely out of luck if that application disappears or suddenly changes its formats.

Flowblade protects your art. By using common MLT formatting, open standards, and open source, you never have to lose an edit again. A project you edit today will be available to you for years to come, and will be portable no matter what. I'm not saying you can open Flowblade projects as an afterthought in any other editor as if all open source video applications talk exactly the same language, but I am saying that it's transparent in how it works, so there's no reverse-engineering or hastily-prepared aftermarket conversion tools that you'll need five years in the future. You own your data, and you own the application that helped you make it. And that, sadly, is a unique thing in modern art technology.

Sync all.

9. Fast

Did I mention Flowblade was fast? It's not that Flowblade does anything too differently from any other video editor, it's just that it doesn't do anything extra that ends up slowing it down. It's a responsive application, and a pleasure to use.

And it's not just fast in normal operation, it has lots of hidden little convenience features that you don't even think to look for until you need it. Little touches like Sync All Compositors, which auto-adjusts the length of composite effects with their parent clips, proxy management for when your video is just too big to be fast, media re-linking, and so much more, as if it's geared to make sure you spend less time fiddling with the editing application and more time editing. At the same time, it makes sure the application isn't wasting your time adjusting UI elements until you decide it's necessary.

screenshot flowblade

10. Stability

OK, OK, it's Murphy's Law that when you need an application to not crash, it will crash, but Flowblade (running on Slackware, at least) is a stable application. Look through its bug reports on Github and you'll see crashes, you'll see glitches, but my measure of stability is a little less granular. Stability is sometimes more a feeling and it's measured in how much dread you feel when your finger is hovering over the icon to launch the application, or before recommending it to a friend or co-worker when they ask "Say, what's a good video editor for Linux?"

So, for the record: I launch Flowblade with confidence, I enjoy my time in it, and I heartily recommend it to friends. Including, dear reader, you.

Lead Image: 
10 reasons to use Flowblade on Linux as your video editor
Channel: 
Article Type: 
Default CC License: 

CC-BY-SA 4.0

Column: 
Multimedia Makers
up
15 readers like this

How to make animated videos with Krita

$
0
0

There are lots of different kinds of animation: hand-drawn, stop motion, cut-out, 3D, rotoscoping, pixilation, machinima, ASCII, and probably more. Animation isn't easy, by any means; it's a complex process requiring patience and dedication, but the good news is open source supplies plenty of high-quality animation tools.

Over the next three months I'll highlight three open source applications that are reliable, stable, and efficient in enabling users to create animated movies of their own. I'll concentrate on three of the most essential disciplines in animation: hand-drawn cel animation, digitally tweened animation, and stop motion. Although the tools are fairly specific to the task, these principles apply to other styles of animation as well.

You can read about some of the more technical details about animation in Animation Basics by Nikhil Sukul.

Krita

From its humble beginnings as "that painter app, the one that comes with KOffice" to a premiere open source freehand paint emulator, Krita has been a favourite graphics tool of mine for years. (I'm not an illustrator, so the boost that Krita gives me to trick people into thinking I have skill with a brush or pen is much appreciated.) As an actual animation program, however, it's very much a new player. Just last year (2015), Krita crowdfunded development, and as a stretch goal, funders voted for an animation plugin. I personally didn't vote for animation; I felt it would only distract Krita from its main purpose. Luckily, I was in the minority, and Krita 3.x features a remarkably stable and capable animation interface.

To be clear: Krita is not a dedicated animation application. It's a paint application that happens to do some animation. It doesn't support advanced digital tweening or soundtrack integration; it just provides onion skinning and a timeline. I'll cover a more advanced animation software in two months; I'm covering Krita here because it's a robust illustration application with a stable animation interface, and it's just plain fun to work with.

Animation walkthrough

The best way to describe it is to do it. This assumes some familiarity with Krita, but you can probably follow along just by knowing the general workflow of a paint application. And if not, read on anyway; you might be pleased with how gentle the learning curve is.

Krita is easy to install; just download the latest stable version from its website. On Linux, if your distribution doesn't have Krita 3.x, then download the Krita AppImage from the site. Make the AppImage executable and run it by either clicking its icon or from a shell; it contains everything you need to run the application.

When Krita launches, create a new empty project using the Custom Document option. Yes, there are templates specific to animation, but those are overkill for the purposes of this walkthrough.

Choose whatever page size (or in this case, frame size) you think your computer can handle. Set the resolution to 72 ppi unless you really plan on printing your animation out to physical media.

The default mode of Krita is paint mode, so to see the animation tools switch to the Animation Workspace using the Workspace Switcher button in the upper right corner of the Krita window.

Workspace Switcher

The animation workspace provides new dockers: the timeline docker along the bottom of the window and the animation and onion skin docker in the lower corner. Krita uses the Qt framework, so you can undock these panels and place them anywhere you find convenient.

In your layers docker you'll already have one layer. Click on that layer's name to give it a proper label like "backdrop". Then create a new layer above that one and call it "ball", because we're going to use it to draw a bouncing ball.

With the backdrop layer active, fill it in with a solid color. To keep things simple, that's all we'll do with that layer, and that's pretty common. Next time you watch a classic Looney Tunes episode, or even something more recent, like Batman The Animated Series, watch the background instead of the main characters to see if you can detect which layer is the backdrop, or matte as it is called.

Next, make the ball layer active.

Frames

The ball layer will house the drawings that move. To enable animation on a layer, right-click on on the frame and select New Frame. This creates an empty cel at frame 0 on the timeline.

Create a new frame.

You'll know that animation has been enabled on a layer by the lightbulb icon in the layer panel.

Animation enabled indicated by light bulb.

Your first cel

Just like that, you're ready to start animating. Let's start with something simple, a bouncing ball.

Let's have the ball come into the frame at the start of our animation. To achieve that, leave the first frame empty.

Progress to the next frame by clicking on the next frame button in the Animation docker, or clicking one frame to the right in the Timeline.

Creating the next frame.

The first appearance of our bouncing ball, you might think, ought to be a circle; after all, most balls (rugby and football excluded) are round. But thinking about velocity and physics and fancy things like that, you'll find it looks more, well, animated, if you make it somewhat oblong, preferably pointing toward the direction you want it to be moving.

Now you have your object at its starting position. Different people animate differently, but I've always been taught to animate based on the theory of key frames. That is, draw the major steps of a complete action first, and then fill in the gaps in between. If we're animating a ball bouncing (and we are, conveniently), then there are three significant points of action:

  • The ball is up in the air heading toward the floor.
  • The ball hits the floor.
  • The ball is back up in the air.

Knowing that you have three main points of action, we can create the frames (and even cheat a little) for each point.

More key frames

We've already created the first key frame.

Create the second frame by right-clicking on frame 6 and selecting New Frame. In this frame, draw your bouncing ball as it would appear when hitting the "floor". What might a ball look like when it comes crashing into the floor? Well, it might look round but more likely it looks "squashed", compressed and distorted by the impact. So draw an oblong ball shape wherever you imagine your floor is in this animation.

For the third frame we can cheat and re-use the first frame, flipped. With such a simple animation it's probably not really worth the effort, but we'll do it any way just to see how the interface works.

To duplicate the first key frame, right-click on frame 2 (that's the third from the right, since Krita starts at 0) and select Copy Frame. This doesn't copy the empty slot in the timeline, it copies the previous frame into the one you've right-clicked. Once you've got your duplicated frame, click and drag the frame over to frame 11 in the timeline.

To flip the frame so that your bouncing ball is flying off in the other direction, go to the Layer menu and select Mirror Layer Horizontally from the Transform section.

Now you have three key frames in what promises to be a very exciting animation.

Onion skin

One thing about the setup so far is that it really is no different than using any other graphic application to animate; we can only see one key frame at a time, so it's hard to tell where the ball was in the past or where it is going to later in the animation. That's important for an animator, because the next step in this process is to draw all those little frames in-between the keys. It helps to see through each layer, at least to some degree, so you know what you're drawing towards.

This is called using an "onion skin", named after the semi-transparent (or semi-opaque?) layers of an onion. To activate this in your animation layer, click the lightbulb icon in either the layer name or the timeline label.

Activate onion skin.

Now that you have a sense for where all the important parts of your animation happen, fill in the gaps. You know the drill: New Frame, draw, rinse, and repeat.

Playback

To see your animation from within Krita, click on the first frame (frame 0) and then Shift+Click on the final frame (frame 12). With these frames selected, click the Play button in the Animation tab.

The playback you first see will happen way too fast because Krita defaults to the industry standard frame-rate of 24 frames per second. Since you've only drawn 12 frames, your animation only lasts half a second.

Slow the frame rate down to 12 or even 8, and your playback will be a little more reasonable. For serious work you'd want to animate at 24 or 25 frames a second, since that happens to be the speed of sound playback, but for little animations you don't have to adhere to that.

Feel free to add more layers. Remember, layers are stagnant pictures unless animation is enabled, and all pictures are solid unless onion skin is activated.

Export

If you make something really cool, you probably want to export it. Krita doesn't tie into any encoder yet (although the latest beta builds, at the time of this writing, do), but exporting to an image sequence and then converting with FFmpeg or ImageMagick is simple. If you don't have FFmpeg and ImageMagick installed, install them now.

Then go to the File menu and select Export Animation.

In the file manager window that appears, create a folder for your animation frames.

Title your first frame 0.png, and save it into your new folder. You should name your first frame as an integer or else it'll be harder to stitch together later.

Once the export is done (it might take a few moments even for 12 frames, since the frames must be composited together 12 times), you can close Krita or switch to another desktop.

Open a terminal window and navigate to the directory containing your frame exports. If you're not sure where that is or how to get there from a terminal, you can just type cd into the terminal and then open a file manager, find the directory, and then drag and drop the directory into a terminal window.

Assuming you have FFmpeg installed, you can create a WebM video:

ffmpeg -r 10 -f image2 -s hd480 -i %05d.png -vcodec vp8 -an bounce.webm

For example:

Or create an animated gif with ImageMagick, using your chosen frame rate as the setting for the -delay option:

convert -delay 10 -loop 0 *.png -scale 75% bounce.gif

The -loop option set to zero indicates an infinite loop.

Bounce animation as gif

Krita is serious

As you can tell from this walkthrough, Krita is a serious contender as an animation application. Its workflow is natural, intuitive, and sensible, and the results can be amazing (poor illustration skills notwithstanding). It's set to be used for elements of an upcoming Pepper & Carrot animated short funded via IndieGogo, and it's being improved and extended by Krita developers.

Krita probably won't be your only animation application, but it's already one of the most fun to work in. Keep an eye on it, use it, and make some kool stuff. Er, cool stuff.

Lead Image: 
How to make animated videos with Krita
Channel: 
Article Type: 
Default CC License: 

CC-BY-SA 4.0

Column: 
Multimedia Makers
Subhead: 

Animation isn't easy, but the good news is that open source supplies plenty of high-quality animation tools.

33
up

DIY spooky bottle labels using Inkscape and coffee grounds

$
0
0

This year for Halloween, we decided to construct a witch's workbench out on the front porch. A trip to the local op shop produced an attractive candlestick, mortar (no pestle), and a small collection of bottles. Witches are nothing if not tidy, so we figured that bottles found near a serious witch's workshop would surely be carefully labeled. After all, one wouldn't want to accidentally use an eye of a frog when the potion calls for an eye of newt, would one?

Spooky bottle labels

Luckily, we just plucked fresh eyeballs last weekend.

To create attractive bottle labels, we decided to start in Inkscape, aiming for an old printing press look. Designs that suggest old-fashioned labels are relatively simple, but the "old" part can be trickier. We figured we had two options: We could design age and erosion into the labels, or we could design the labels as new and then distress them after printing. Seth supported the first option, because he felt that consumer-grade printer ink just wouldn't stand up to the abuse it would require to make the labels look old. As a result, Jess designed a few labels twice: once with age, and once without.

Inkscape

The bottles we had on hand dictated the size and shape of the labels we could create. Inkscape, being vector-based, is entirely impartial to measurement or size; everything can be scaled up or down as needed. Even so, there are fewer variables if you start your design out closer to your target size; this way, you get fewer surprises later on when you try to scale something and realise that your strokes are not scaling as you expected, or fonts don't look quite as cool as you thought they did, and so on.

Art size

You can manage sizes in Inkscape in several different ways, but the two ways we do it are either: Set the canvas size to our target, or use a shape within Inkscape as a guide.

To set the canvas size:

  1. Go to the File menu and select Document Properties.

  2. In the Document Properties window, choose your unit of measure and enter the size you want to use as your canvas.

Inkscape document properties

The canvas size has no real implication; it just serves as a guide for your design. It can be changed to something larger like Letter or A4 later, when it's time to print.

To use a shape as a guide:

Alternately, you can create a guide for yourself with a shape. So that you guides stay out of your way, we find it best to place it on a separate layer entirely, which we hide during the print phase.

  1. Go to the Layer menu and select Layers. This displays the Layers panel.

  2. In the Layers panel, click the + button to add a layer. Give the layer a name (something like guidelayer is sensible).

  3. With the Rectangle Tool, draw a box on the canvas. Don't worry about the size, just get a box on the canvas.

  4. Use the tool properties, in the Tools Controls Bar along the top of Inkscape, to set your unit (it usually defaults to pixels, but you probably want centimeters or inches). Adjust the size (the Wand H values) to match your target. You can ignore the Rx and Ry values; they control the box's location on the page, which you can do by dragging-and-dropping.

  5. Use the Fill and Stroke panel to eliminate the colour fill and set the edge stroke to suit your preference.

  6. Create a new layer above the guidelayer so that you can do your design work "above" the guides.

Inkscape layers

Assets and adjustments

If you're really good at freehand artwork, you're free to generate a label entirely from scratch. We preferred to take a collage approach, taking elements of actual old labels that we found online, combined with bits and bobs we created ourselves.

Obviously there are plenty of creative commons and open source assets available online; far too many to link to here. More important than the links are what you can look for, because not all of it is obvious.

Fonts

Free fonts abound online, and they add a lot to the emotion you're trying to evoke. Just as significantly, though, are the pictogram fonts providing little icons and classic symbols. There's an old etching of a skull wearing a crown that Seth is fond of, but it doesn't look nearly as good reduced to a tiny printed icon; Jess took the idea and ran with it, acquiring a skull and crown from a font, treating them as graphics, combining them, and in the end produced an attractive (but deadly) label graphic that you might see in a slightly anachronistic apothecary.

Fonts

GIMP brushes

Given that Jess did the design work in Inkscape, you might not expect GIMP brushes to be useful, but in fact there are free sets of GIMP (and Adobe brushes that GIMP can use) brushes out there that provide amazing graphical elements like iconography, paisley, damask, and lots more.

To use them, either use them as intended in GIMP, or do some quick conversion:

  1. Install a brush, open GIMP, and make a black-on-white mark with it in GIMP.

  2. Import the image into Inkscape.

  3. Select the image, and go to the Path menu. Select Trace Bitmap.

Trace on GIMP

  1. Usually the default settings are good, but add the Remove Background option at the bottom of the Trace Bitmap window.

  2. Click the OK button. In the blink of an eye (really! it takes almost no time at all), it's done. Close the Trace Bitmap window.

  3. Select your image and delete it. A vector tracing should remain, which you can use and even edit.

Textures

We ended up not using textures, but that doesn't mean you won't. There are plenty of free textures online, which you can use as backgrounds or even embellishments. By combining text with textures, you can make your text look like pretty much any material you want, or else add paint cracks or age. As a background, a good texture can emulate anything from paper, cloth, muslin, marble, wood, or anything else.

Seth had faith in our ability to mimic age and erosion digitally, but Jess felt that there was value in actual, physical erosion. Once we'd gotten designs we were happy with, we printed the labels on standard printer paper and then opened up the art kit.

We went through several iterations before we found what materials agreed with standard printer paper and ink, but ultimately we used watercolor paints for the colorful labels, and heavily reduced Twining Earl Grey tea and just a touch of ground coffee for the aged labels.

Tea

Tea, Earl Grey, hot.

The coffee proved rough on the ink, so it was used sparingly.

Coffee on label

We boiled tea down from one cup to about a tablespoon and, once it cooled, dipped the labels into it. It worked like a charm.

Iterations

The labels that we had attempted to age digitally ended up suffering the most from the physical materials, and we ended up with labels that were too distressed. The labels that started clean responded to the physical materials quite well, and ended up looking perfectly aged.

Mod Podge, a special crafter's glue and sealant, was used to apply the labels to the bottles.

The results were exactly what we'd been looking for, and exactly what our witch's workbench needed.

Lead Image: 
DIY spooky bottle labels using Inkscape and coffee grounds
Channel: 
Article Type: 
Default CC License: 

CC-BY-SA 4.0

Credits: 
Cyanide Cupcake
27
up

What software documentation can learn from tabletop gaming

$
0
0

Do you remember Monopoly and Life and Clue, and all those old classic board games you played as a kid because sometimes you were just that bored? Do you recall ever reading the instructions? Probably not, because nobody reads the instructions for those games. We all had a friend who kinda knew how to play the game, so they taught us how to play, and that was good enough. (Seriously, go back and re-read the instructions for Monopoly; I'll bet you Internet money that you've never played the actual game.)

If you ever did try to read the instructions, you found that they'd been written back in 1962, and read almost identically to the repair manual to the General Electric Refrigerator. They were just as detailed, just as complete, and just as interesting.

Does this sound familiar to you?

Think again. Does it possibly sound too familiar to you? Well, it should, because this is the exact same problem that software documentation still has today.

Tabletop gaming instructions

I'll never forget the first time I bought a modern tabletop game. I opened the box and took a deep breath. It was time to read the instructions.

To my surprise, the instructions were written on just half a sheet of paper, in big typeface, with lots of whitespace and three big numbers with Ikea-style illustrations that were almost insultingly obvious:

  1. Deal five cards to each player. (Picture of a five card hand, exposing the reader to the different types of cards they'll encounter during a game.)
  2. Place a Quest card on the table, play as instructed. (Picture of what a Quest card looks like.)
  3. Play two cards each turn. Do what the cards tell you to do. Winner is the first person to accomplish what's written on the most recent Quest card played.

"You're playing!"

That was it. Those were the (altered for the sake of this example) instructions. Three steps and one big shout that hey, don't look now but you're playing the game already, and you're up and running.

To be fair, there were a lot of nuances that those three steps did not in any way cover. Luckily, there were three more paragraphs that the author snuck in after the "You're playing!" pronouncement, providing more details on the types of cards, what they mean, and so on.

And there were lots of times during those first few games where we had to stop game play and scratch our heads, asking "Wait, we can't play this card after that card can we? What happens now?" For an answer, we went back to the rules and looked in the little reference section on the back of the rule sheet, learning about the technicalities of the game as we went along.

But you see, it tricked us; we didn't feel like we were reading the instructions because we were actively playing the game. We weren't reading instructions, as such; we were using the rules as reference. It was practically part of the game.

Making software documentation part of the game

Not everything fits into three steps, three follow-up paragraphs, and a reference section. But you'd be surprised at how much better instructions are when that's what you aim for. For example:

Three easy steps

  1. Give your reader a clear entry point. People reading a user guide want to know how to use your application, not to understand the philosophy that drove you to write it.
  2. Enumerate the things a user must do. It's a form of good bedside manner; it's not strictly necessary, but it helps a user understand exactly what your application expects from them. It's a checklist so they know that these are the right steps to take when approaching this application.
  3. Drop your user off at a spring board, not a pit full of spikes. After your enumerated "getting started" list, make sure your users are set to go further. This was your sales pitch: look how easy it is to get started! it only took three steps! Now wouldn't you like to read the next three paragraphs to find out what cool things you can do from here? If your user comes down off your three-step introduction staring at a blank screen with no idea of what could possibly be next, you need to either rewrite your documentation, or maybe you need to rewrite the application.

That's it!

Yes, announce to your user, often, where they are in your documentation. It might seem patronizing, but your reader has no idea where they are along the path to becoming a pro at this strange new app. So tell them. Did they just do 50% of what your application is capable of doing? Or have all they done is configure it so that it will launch on their system? Tell them. Let them know. Be clear, be honest, be excited. Assure them that this is all very normal, and let them in on what's happening, like whether or not they're meant to do these steps every single time they sit down to use the application, or whether it was a one-time setup that they'll never do again.

Communicate.

And that's all the introduction should be. Easy, assuring, affirming, ego-stroking. You're just selling your reader on the fact that you PROMISE your application is approachable. They can do this.

Three paragraphs

After you've assured your reader that they can take this application on and win, talk them through where they should go next. Are they using this application to construct widgets or to analyse widgets? It can do both, so the path to one is found in chapter 3 and the path to the other is in chapter 4. Are they setting this application up on a server or will it be used locally? Go to chapter 5 or 6, accordingly. And so on.

The purpose of the follow up section is to warn your reader what they're in for once they actually get down to work. You're describing the layout of the land, the opponents they'll encounter, the weapons and powerups they have access to, and so on. You don't necessarily have to tell them how to accomplish anything, you just need to explain to them what buttons to press in order to dive right in, and what chapter or section to turn to when they realise they probably ought to study up on this first.

Everything else

Look, by this time, you've got your user. The application isn't scary any more, they're ready to start using the thing. If they've made it to the meat-and-potatoes section, then the General Electric Refrigerator repair manual is more or less what they're looking for. I prefer to write a little more humanely than a literal refrigerator repair manual, but this is the section where details can be given, workflows analysed, frameworks discussed, design philosophies revealed, concepts explained, and so on.

If a user is here, then they're using your application enough to know what to ask. This is where you can spell out the function of each and every button, and every menu item, and which window panels do what.

Prove it

I know what you're thinking. You think that a quick 3-step intro can't be done, or if it is done then it'll be a useless, trite introduction that doesn't actually communicate useful information.

Dungeon Delvers gameBut I beg to differ. The Creative Commons game, Dungeon Delvers, creates a fully functional role-playing game (RPG) framework in just six pages of poker card-sized frames, which you're meant to fold into a booklet and keep in your wallet, so you're always sure to have an RPG rulebook in the case of a sudden outbreak of role playing.

The infamously complex ruleset of Dungeoneer gets condensed onto a single card as a reminder for players about the phases of their turn.

So don't discount the power of the "elevator pitch". Not everything can be introduced in literally "3 Easy Steps!", but I guarantee if you shoot for that, then your documentation will do amazing things.

As an example, here's a quick introduction to a video editor. Not necessarily the easiest sort of application to introduce, right? It's probably impossible, but let's give it a go:

  1. Launch Flowblade and click the Add button in the middle panel.
  2. Double-click the clip thumbnail in the middle panel to open the video in the video monitor on the right.
  3. Using the i and o keys on your keyboard, mark the In and Out points of the footage you like. Add it to your timeline with the Append button on the far right of the middle button bar.

You're editing video! To learn more about editing, see chapter blah blah blah.

Or maybe it is possible, after all! Sure, for "3 easy steps" there are a lot of compound sentences, but your reader won't notice; they're too busy following instructions and being dazzled by the big numbers of your numbered list!

You see, I'm not saying documentation is honest. In fact, I'm saying it's all show! Grab hold of your reader fast, get them working with your application and they'll forget all about how intimidated they were to get started.

Outliers

Admittedly, there are some things that just don't fit this perfect model. Would I write a three step introduction to GlusterFS, a complex, scalable network filesystem? No, but the Gluster team wrote a six step introduction, which is A) a multiple of three and B) amazing.

Would I write a three step introduction to LVM, a RAID-like filesystem manager? No, but I've seen it done in seven steps (which, arguably, could be re-structured to get down to six or three steps, if I was stubborn).

The examples could continue, but the point isn't actually whether we can boil a Postfix configuration down to three easy steps (which, for the record, I have not been able to do), it's about whether we are aiming for simplified docs that provide an entry point, or whether we just slam prospective users with a manifest of every datatype contained in an application's code, inviting them to write their own darned user guide from it once they've figured out what it all means.

Give it a go the next time you write some documentation. You might surprise yourself, and, more importantly, your users.

Lead Image: 
What software documentation can learn from tabletop gaming
Tags: 
Channel: 
Article Type: 
Default CC License: 

CC-BY-SA 4.0

Column: 
Doc Dish
17
up

Creating stop motion animation with StopGo

$
0
0

Last month we looked at digital cell animation with Krita. Cell animation is just one kind of animation, though, so this month we'll take a look at stop motion animation. As an added feature, since DIY projects have been highlighted in the past weeks, the resulting animations from the application have all been done by year 5 and 6 students at local schools, and the application itself was developed by me and the students' teacher, Jess Weichler of Makerbox.

Using StopGo

The application is called StopGo. It came about as a direct response to the lack of a reliable and simple stop motion software for Linux. From its inception, it's been designed by its primary user and intended audience: a teacher and her students. As part of the classroom activities, the students are encouraged to file feature requests.

We've all seen stop motion animation before: there's Gumby, Terry Gilliam's famous cut-out interludes for Monty Python, and recent movies like The Box Trolls. The principle is the exact same as hand-drawn animation, except instead of drawing a character, you photograph an object, moving the object little by little between each snapshot. The object can be anything from paper cutouts to elaborately sculpted models.

It's not hard to set up a basic stop motion rig, and the truth is that absolutely no computer is required. Grab a camera and a few objects from your junk drawer, and you're ready to go; take lots of photos of the objects moving little by little, string the photos together, and you're animating.

What StopGo brings to this tradition, primarily, is a visual interface in which to manage each still frame and, most importantly, the "onion skin" effect that makes it easy to gauge whether you've moved a character enough or too much or not at all since the previous frame. You saw this in the Krita demo, and it's considered one of the most important features of a proper animation workflow.

Installing StopGo

StopGo is easy to install. In fact, there is no install: you just download the AppImage, plug in your camera, and launch StopGo. It's a zero-install, portable app that should work on any recent Linux distribution. It's not a true portable app since it does require both FFmpeg and vlc, each available from your distribution's repository (or third party repositories like RPMFusion), but that's largely a design choice, as we prefer to keep important libraries and executables configurable by the user.

The StopGo interface.

Support outside of Linux is forthcoming, but still in development (merge requests welcome!).

Using Stopgo

Once you've got StopGo on your system, plug in your camera and then launch StopGo either by clicking the StopGo icon, or from a shell. You do have to plug in your camera first; there's no refresh on the camera selection menu yet, so once it's launched it won't detect a new device unless you close it and re-launch.

The interface is intuitive enough for an eight-year old child (we know; we've tested), but here's a quick overview: the bottom panel houses thumbnails of each frame, and the top panel displays either your camera's image or the current frame you have selected. You'll know when a frame is selected by the star banner in the corner of the thumbnail.

Selected frame.

Along the middle bar are the controls, such as they are: there's a play button (does what it sounds like it does), the snapshot button (again, it does what you think it does), and the camera selection dropdown menu.

Animation walkthrough

The first step is to create a project. You can't start animating without one, so create an empty project immediately after launching, or open an existing project if you've already started one.

Once you've created a project you're ready to start. Take a snapshot, and then move your model a little. The StopGo screen will show you two images, overlaid on top of one another. The previous frame is half opacity, the full opacity is your live camera view.

Onion skin.

To maintain the illusion of smooth motion, each movement should be small and progressive.

Each frame you take appears in the lower thumbnail panel, but the snapshot button remains highlighted to indicate that a new snapshot may be taken at any time.

If you make a mistake, delete a frame by clicking on the frame and pressing the Delete key on your keyboard. The most common mistake is taking a snapshot of your own hand as you retreat from the stage, so just look for your hand in the thumbnails, delete, and continue.

Importing frames

StopGo doesn't care whether you've taken photos with its interface or not; you can also use StopGo to import an image sequence, play through it, and then export as a movie. Do this with the Import function in the File menu. Currently, only sequential JPEGs are supported, but support for more formats are forthcoming.

In this way, I have had users draw digital cells in Inkscape, import those cells into StopGo, and export the frames as a movie file. It's the long way around, but if StopGo can help people get over the learning curve of FFmpeg and successfully produce an animation all their own, then StopGo has accomplished its mission.

Playback

Click the Play button to start playback of your animation.

Rendering

Once your animation is finished, export your work with the Render selection from the File menu. By default, the frame rate of StopGo animation is 8 frames per second. That's a mere third of the industry standard of 24 fps, but it brings with it the distinct advantage of only having to produce, for example, 8 snapshots for one second of animation intead of 24 snapshots, or 480 for a minute instead of 1,440, a huge difference.

The more frames the smoother the action, though, so if you're working on something that you want to be as fluid as possible, use a higher frame rate.

The default resolution is HD 1080, with an option to use HD 720 for a smaller file size.

These export options can be set in the Preferences selection in the Edit menu, but if you're doing very advanced work then you might prefer to use StopGo only as the front end for your photos, doing a manual export of the frames. StopGo saves all images as image files in its project folder, so you're free to use ffmpeg from a shell to process your images outside of the StopGo interface.

Unless your project is very long, the render should happen quickly. Once finished, you'll have a .webm file on your desktop, suitable for posting to a video sharing site, your own website, or your mobile.

StopGo

StopGo is in use for animation every term at a number of local schools in Wellington, New Zealand. It's constantly improving and it's a project quite happy to receive contribution and improvement. It's written in Python, using mostly the wxWidgets framework and the VLC Python API. Its source code is hosted on notklaatu/stopgo .

Take some time out to watch some of the Lego, Clay, and cut-out student projects that have been created with StopGo, and then go make your own!

Lead Image: 
Creating stop motion animation with StopGo
Channel: 
Article Type: 
Default CC License: 

CC-BY-SA 4.0

Column: 
Multimedia Makers
10
up
Viewing all 534 articles
Browse latest View live